Source installation#
Prerequisites#
- OS
-
ROS
- ROS 2 Humble
For ROS 2 system dependencies, refer to REP-2000.
- Git
- Registering SSH keys to GitHub is preferable.
sudo apt-get -y update
sudo apt-get -y install git
How to set up a development environment#
-
Clone
autowarefoundation/autowareand move to the directory.git clone https://github.com/autowarefoundation/autoware.git cd autowareBy default, this checks out the
mainbranch, which contains the latest in-development changes. If you want to use a stable release, check out the corresponding release tag. For example, to use the1.8.0release (compatible with both ROS 2 Humble and Jazzy):git checkout 1.8.0The list of available tags can be found on the autoware releases page.
-
If you are installing Autoware for the first time, you can automatically install the dependencies by using the provided Ansible playbook.
bash ansible/scripts/install-ansible.sh
ansible-galaxy collection install -f -r ansible-galaxy-requirements.yaml
ansible-playbook autoware.dev_env.install_dev_env
To install without NVIDIA GPU support:
ansible-playbook autoware.dev_env.install_dev_env --skip-tags nvidiaIf you encounter any build issues, please consult the Troubleshooting section for assistance.
Info
Before installing NVIDIA libraries, please ensure that you have reviewed and agreed to the licenses.
Note
The following items will be automatically installed. If the ansible script doesn't work or if you already have different versions of dependent libraries installed, please install the following items manually.
- Install Ansible
- Install Build Tools
- Install Dev Tools
- Install gdown
- Install geographiclib
- Install the RMW Implementation
- Install ROS 2
- Install ROS 2 Dev Tools
- Install Nvidia CUDA
- Install Nvidia cuDNN and TensorRT
- Install the Autoware RViz Theme (only affects Autoware RViz)
- Download the Artifacts (for perception inference)
How to set up a workspace#
If you prefer a graphical user interface (GUI) over the command line for launching and managing your simulations, refer to the Using Autoware Build GUI section at the end of this document for a step-by-step guide.
-
Create the
srcdirectory and clone repositories into it.Autoware uses vcs2l to construct workspaces.
cd autoware
mkdir -p src
vcs import src < repositories/autoware.repos
If you are an active developer, you may also want to pull the nightly repositories, which contain the latest updates:
vcs import src < repositories/autoware-nightly.repos⚠️ Note: The nightly repositories are unstable and may contain bugs. Use them with caution.
Optionally, you may also download the extra repositories that contain drivers for specific hardware, but they are not necessary for building and running Autoware:
vcs import src < repositories/extra-packages.repos⚠️ You might need to install the dependencies of the extra packages manually.
➡️ Check the readme of the extra packages for more information.
-
Add community packages to your workspace. (optional) NEW
The Autoware Index is a registry of community packages that extend Autoware, each built and tested against the latest Autoware release. Pick packages on its browse site or with
aw-index-clito generaterepositories/autoware-index.repos, then import it the same way:vcs import src < repositories/autoware-index.repos➡️ See the Autoware Index page for the full guide.
-
Install dependent ROS packages.
Autoware requires some ROS 2 packages in addition to the core components. The tool
rosdepallows an automatic search and installation of such dependencies. You might need to runrosdep updatebeforerosdep install.source /opt/ros/humble/setup.bash # Make sure all previously installed ros-$ROS_DISTRO-* packages are upgraded to their latest version sudo apt update && sudo apt upgrade rosdep update rosdep install -y --from-paths src --ignore-src --rosdistro $ROS_DISTRO -
Install and set up ccache to speed up consecutive builds. (optional but highly recommended)
-
Build the workspace.
Autoware uses colcon to build workspaces. For more advanced options, refer to the documentation.
colcon build --symlink-install --cmake-args -DCMAKE_BUILD_TYPE=ReleaseIf there is any build issue, refer to Troubleshooting.
-
Follow the steps in Network Configuration before running Autoware.
-
Apply the settings recommended in Console settings for ROS 2 for a better development experience. (optional)
How to update a workspace#
-
Update the
.reposfile.cd autoware git pull <remote> <your branch><remote>is usuallygit@github.com:autowarefoundation/autoware.git -
Update the repositories.
vcs import src < repositories/autoware.repos⚠️ If you are using nightly repositories, you can also update them.
vcs import src < repositories/autoware-nightly.reposvcs pull srcFor Git users: -
vcs importis similar togit checkout. - Note that it doesn't pull from the remote. -vcs pullis similar togit pull. - Note that it doesn't switch branches.For more information, refer to the official documentation.
It might be the case that dependencies imported via
vcs importhave been moved/removed. Vcs2l does not currently handle those cases, so if builds fail aftervcs import, cleaning and re-importing all dependencies may be necessary:rm -rf src/* vcs import src < repositories/autoware.repos⚠️ If you are using nightly repositories, import them as well.
vcs import src < repositories/autoware-nightly.repos -
Install dependent ROS packages.
source /opt/ros/humble/setup.bash # Make sure all previously installed ros-$ROS_DISTRO-* packages are upgraded to their latest version sudo apt update && sudo apt upgrade rosdep update rosdep install -y --from-paths src --ignore-src --rosdistro $ROS_DISTRO -
Build the workspace.
colcon build --symlink-install --cmake-args -DCMAKE_BUILD_TYPE=Release
Using Autoware Build GUI#
In addition to the traditional command-line methods of building Autoware packages, developers and users can leverage the Autoware Build GUI for a more streamlined and user-friendly experience. This GUI application simplifies the process of building and managing Autoware packages.
Integration with Autoware source installation#
When using the Autoware Build GUI in conjunction with the traditional source installation process:
- Initial Setup: Follow the standard Autoware source installation guide to set up your environment and workspace.
- Using the GUI: Once the initial setup is complete, you can use the Autoware Build GUI to manage subsequent builds and package updates.
This integration offers a more accessible approach to building and managing Autoware packages, catering to both new users and experienced developers.
Getting started with Autoware Build GUI#
- Installation: Ensure you have installed the Autoware Build GUI. Installation instructions.
- Launching the App: Once installed, launch the Autoware Build GUI.
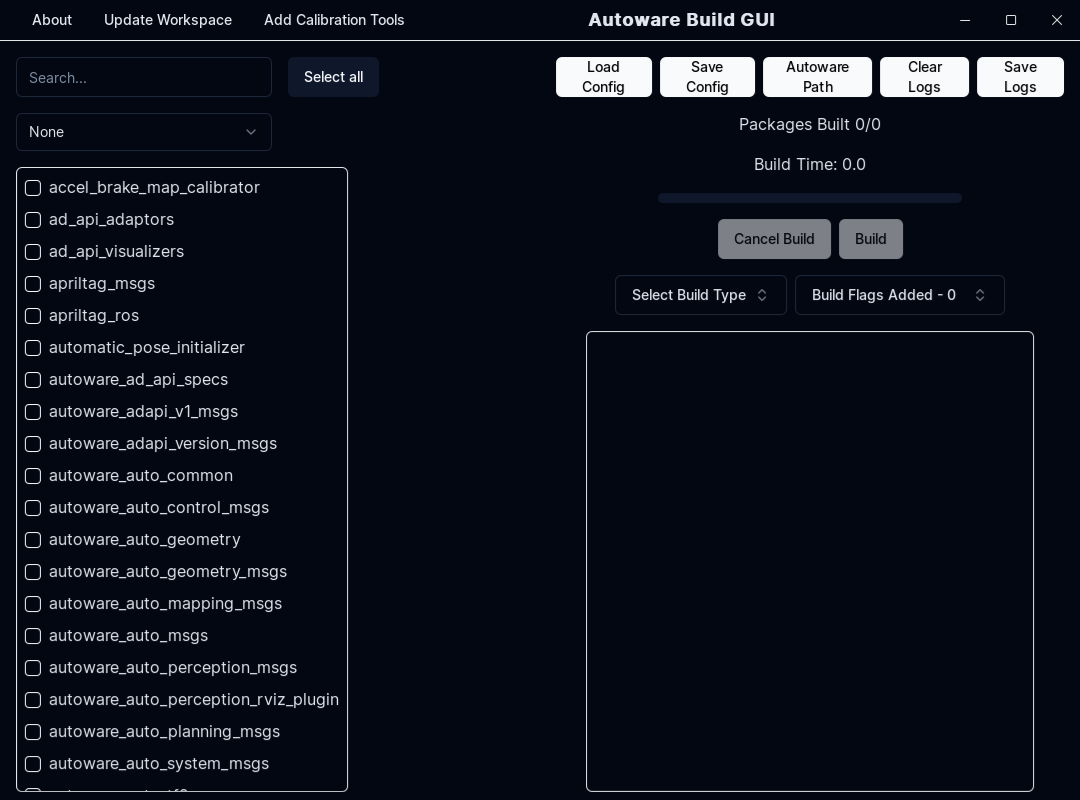
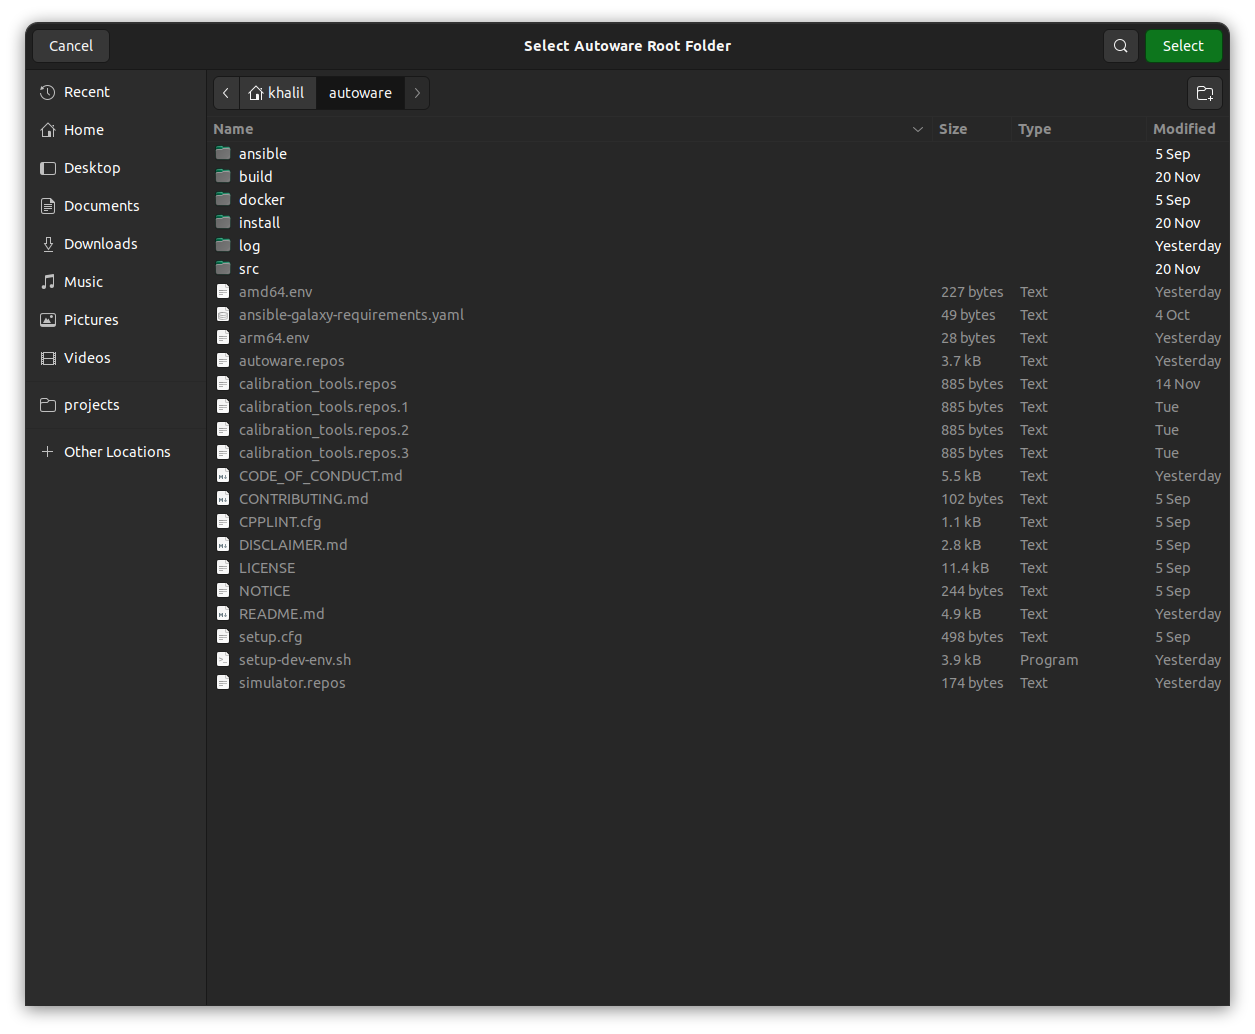
- Setting Up: Set the path to your Autoware folder within the GUI.
-
Building Packages: Select the Autoware packages you wish to build and manage the build process through the GUI.
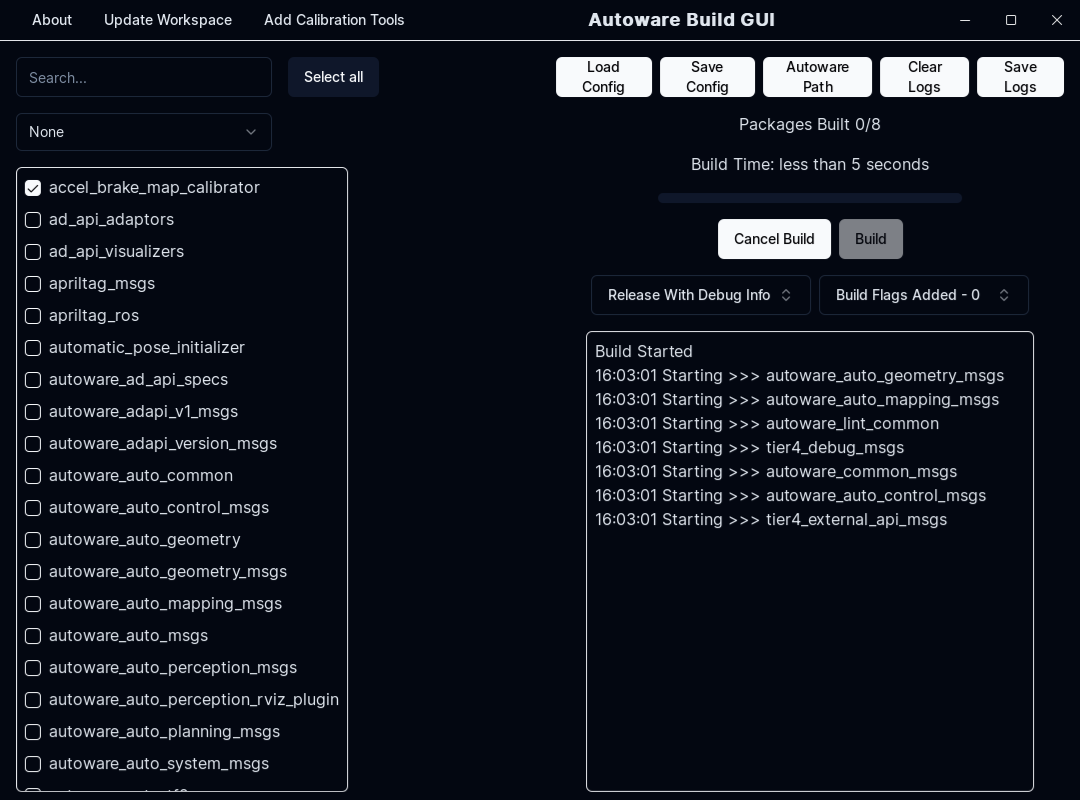
4.1. Build Configuration: Choose from a list of default build configurations, or select the packages you wish to build manually.
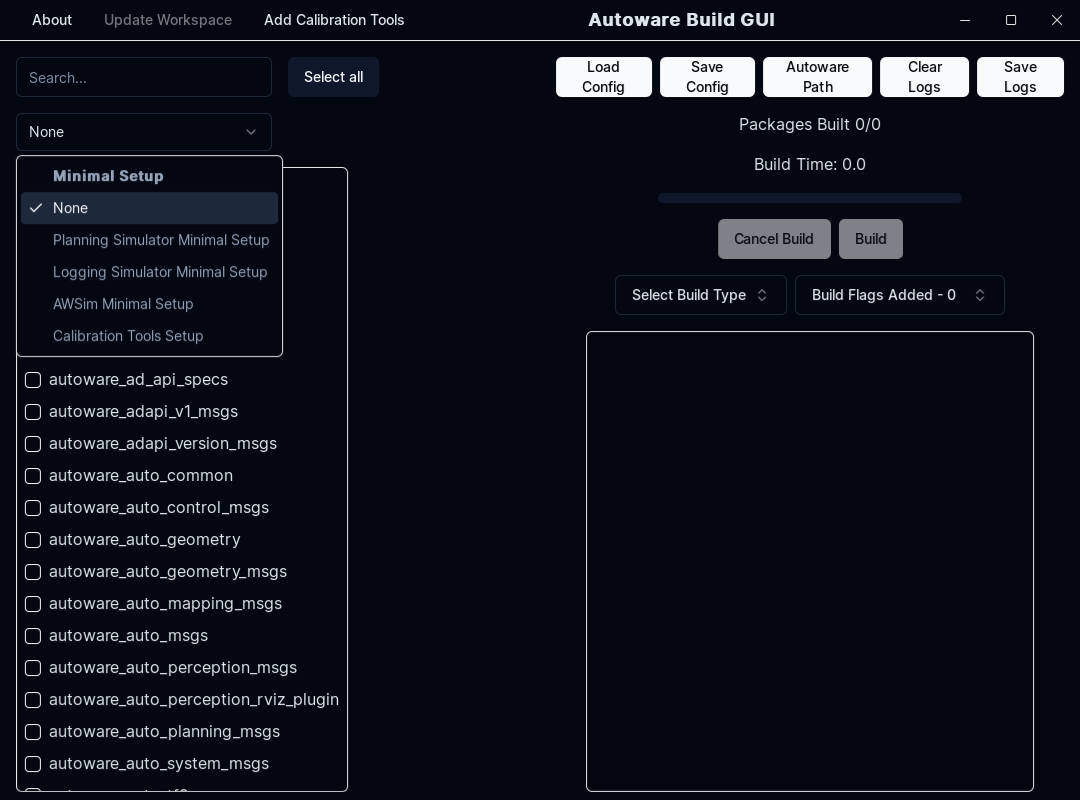
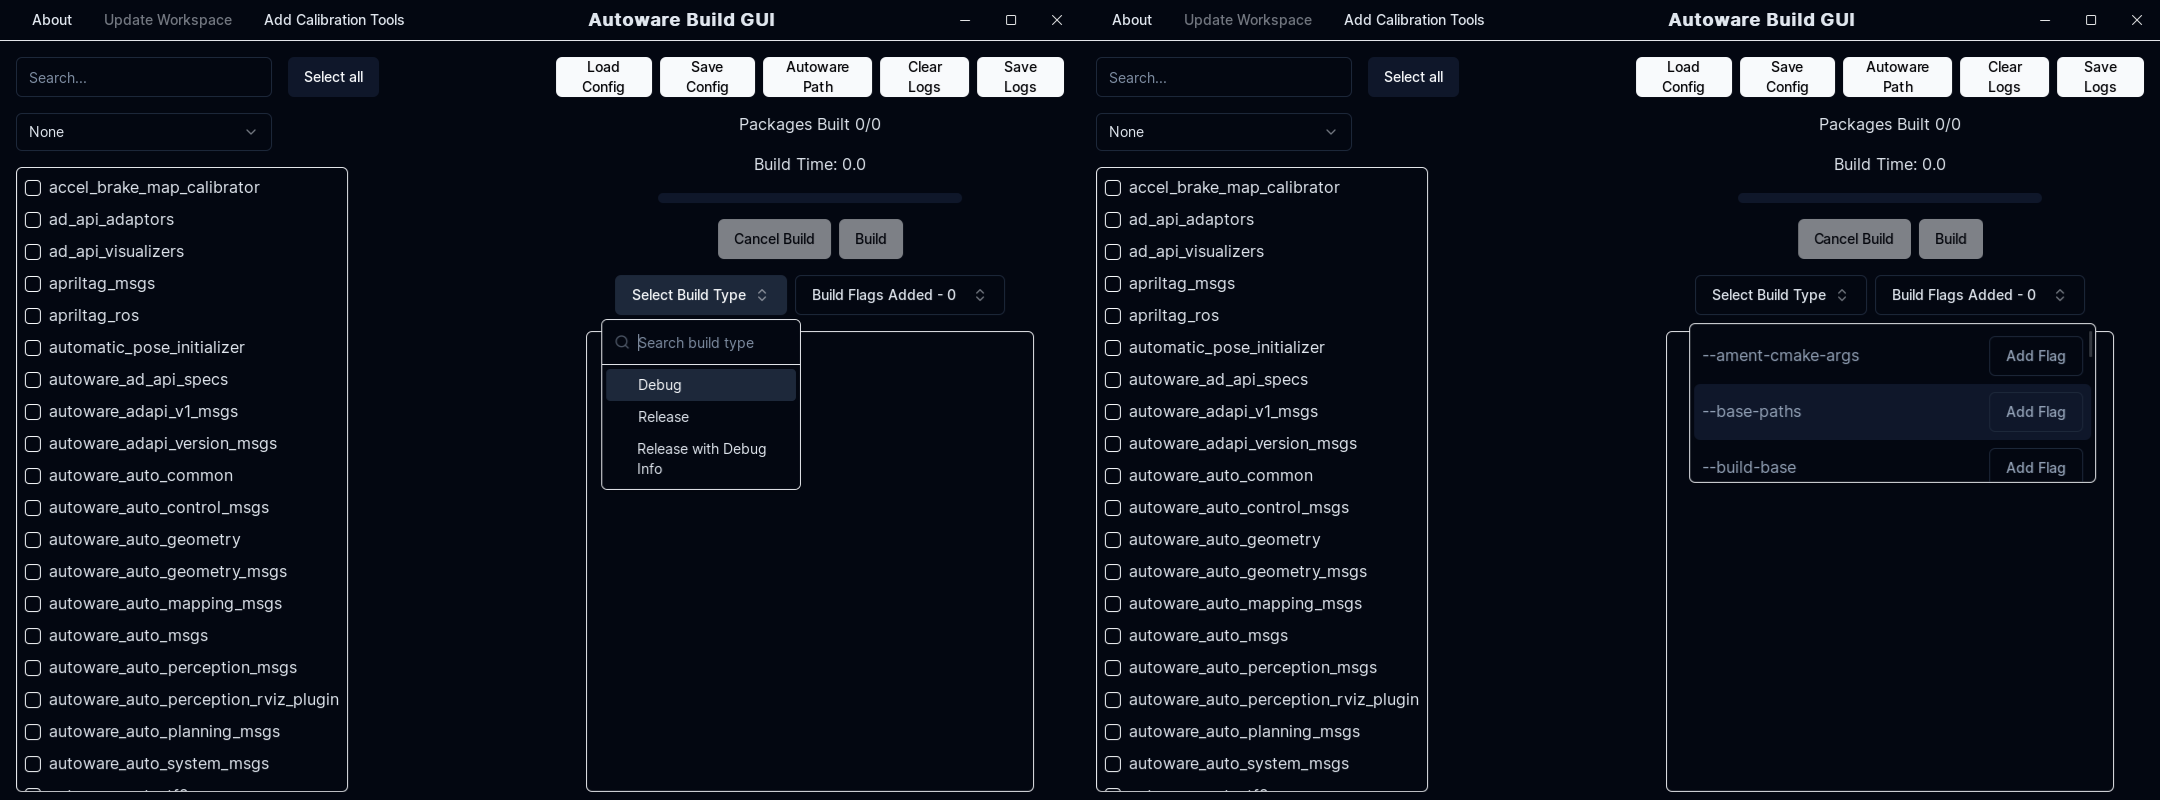
4.2. Build Options: Choose which build type you wish to use, with ability to specify additional build options.
-
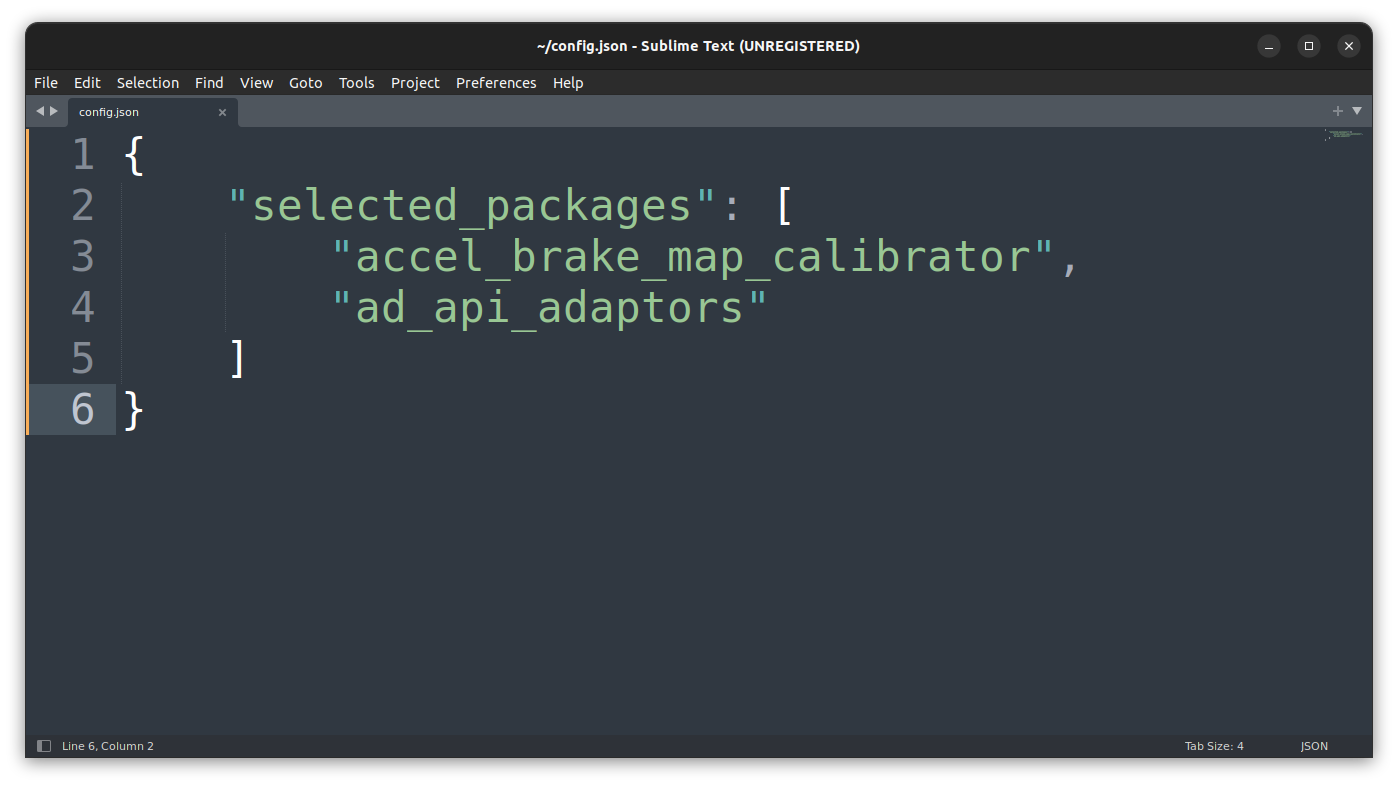
Save and Load: Save your build configurations for future use, or load a previously saved configuration if you don't wish to build all packages or use one of the default configurations provided.
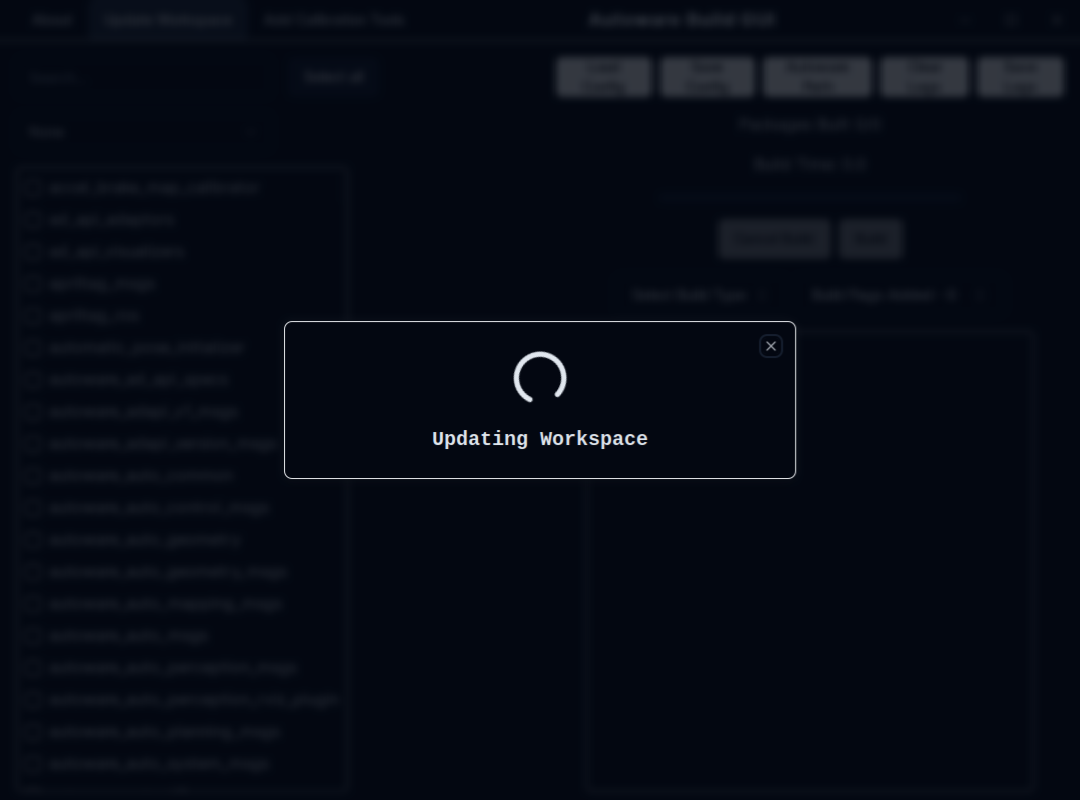
- Updating Workspace: Update your Autoware workspace's packages to the latest version using the GUI or adding Calibration tools to the workspace.