Integrating Autoware with your vehicle#
1. Prepare your real vehicle hardware#
Prerequisites for the vehicle:
- An onboard computer that satisfies the Autoware installation prerequisites
- The following devices attached
- Drive-by-wire interface
- LiDAR
- Optional: Inertial measurement unit
- Optional: Camera
- Optional: GNSS
2. Create maps#
You need both a pointcloud map and a vector map in order to use Autoware.
Create a pointcloud map#
Use third-party tools such as a LiDAR-based SLAM (Simultaneous Localization And Mapping) package to create a pointcloud map in the .pcd format.
Some examples are:
Create vector map#
Use third-party tools such as TIER IV's Vector Map Builder to create a Lanelet2 format .osm file.
3. Create your Autoware meta-repository#
Create your Autoware meta-repository. One easy way is to fork autowarefoundation/autoware and clone it. For how to fork a repository, refer to GitHub Docs.
git clone https://github.com/YOUR_NAME/autoware.git
If you set up multiple types of vehicles, adding a suffix like "autoware.vehicle_A" or "autoware.vehicle_B" is recommended.
4. Create the description packages of your vehicle#
Next, you need to create description packages that define the vehicle and sensor configuration of your vehicle.
Create the following two packages:
Once created, you need to update the autoware.repos file of your cloned Autoware repository to refer to these two description packages.
-  # sensor_kit
-  sensor_kit/sample_sensor_kit_launch:
-    type: git
-    url: https://github.com/autowarefoundation/sample_sensor_kit_launch.git
-    version: main
-  # vehicle
-  vehicle/sample_vehicle_launch:
-    type: git
-    url: https://github.com/autowarefoundation/sample_vehicle_launch.git
-    version: main
+  # sensor_kit
+  sensor_kit/YOUR_SENSOR_KIT_launch:
+    type: git
+    url: https://github.com/YOUR_NAME/YOUR_SENSOR_KIT_launch.git
+    version: main
+  # vehicle
+  vehicle/YOUR_VEHICLE_launch:
+    type: git
+    url: https://github.com/YOUR_NAME/YOUR_VEHICLE_launch.git
+    version: main
Adapt YOUR_VEHICLE_launch for autoware launching system#
At YOUR_VEHICLE_description#
Define URDF and parameters in the vehicle description package (refer to the sample vehicle description package for an example).
At YOUR_VEHICLE_launch#
Create a launch file (refer to the sample vehicle launch package for example).
If you have multiple vehicles with the same hardware setup, you can specify vehicle_id to distinguish them.
Adapt YOUR_SENSOR_KIT_description for autoware launching system#
At YOUR_SENSOR_KIT_description#
Define URDF and extrinsic parameters for all the sensors here (refer to the sample sensor kit description package for example). Note that you need to calibrate extrinsic parameters for all the sensors beforehand.
At YOUR_SENSOR_KIT_launch#
Create launch/sensing.launch.xml that launches the interfaces of all the sensors on the vehicle. (refer to the sample sensor kit launch package for example).
Note
At this point, you are now able to run Autoware's Planning Simulator to do a basic test of your vehicle and sensing packages. To do so, you need to build and install Autoware using your cloned repository. Follow the steps for either Docker or source installation (starting from the dependency installation step) and then run the following command:
ros2 launch autoware_launch planning_simulator.launch.xml vehicle_model:=YOUR_VEHICLE sensor_kit:=YOUR_SENSOR_KIT map_path:=/PATH/TO/YOUR/MAP
5. Create a vehicle_interface package#
You need to create an interface package for your vehicle. The package is expected to provide the following two functions.
- Receive command messages from
vehicle_cmd_gateand drive the vehicle accordingly - Send vehicle status information to Autoware
You can find detailed information about the requirements of the vehicle_interface package in the Vehicle Interface design documentation.
You can also refer to TIER IV's pacmod_interface repository as an example of a vehicle interface package.
6. Launch Autoware#
This section briefly explains how to run your vehicle with Autoware.
Install Autoware#
Follow the installation steps of Autoware.
Launch Autoware#
Launch Autoware with the following command:
ros2 launch autoware_launch autoware.launch.xml vehicle_model:=YOUR_VEHICLE sensor_kit:=YOUR_SENSOR_KIT map_path:=/PATH/TO/YOUR/MAP
Set initial pose#
If GNSS is available, Autoware automatically initializes the vehicle's pose.
If not, you need to set the initial pose using the RViz GUI.
- Click the 2D Pose estimate button in the toolbar, or hit the P key
- In the 3D View pane, click and hold the left mouse button, and then drag to set the direction for the initial pose.
Set goal pose#
Set a goal pose for the ego vehicle.
- Click the 2D Nav Goal button in the toolbar, or hit the G key
- In the 3D View pane, click and hold the left mouse button, and then drag to set the direction for the goal pose. If successful, you will see the calculated planning path on RViz.
Engage#
In your terminal, execute the following command.
source ~/autoware.YOURS/install/setup.bash
ros2 topic pub /autoware.YOURS/engage autoware_auto_vehicle_msgs/msg/Engage "engage: true" -1
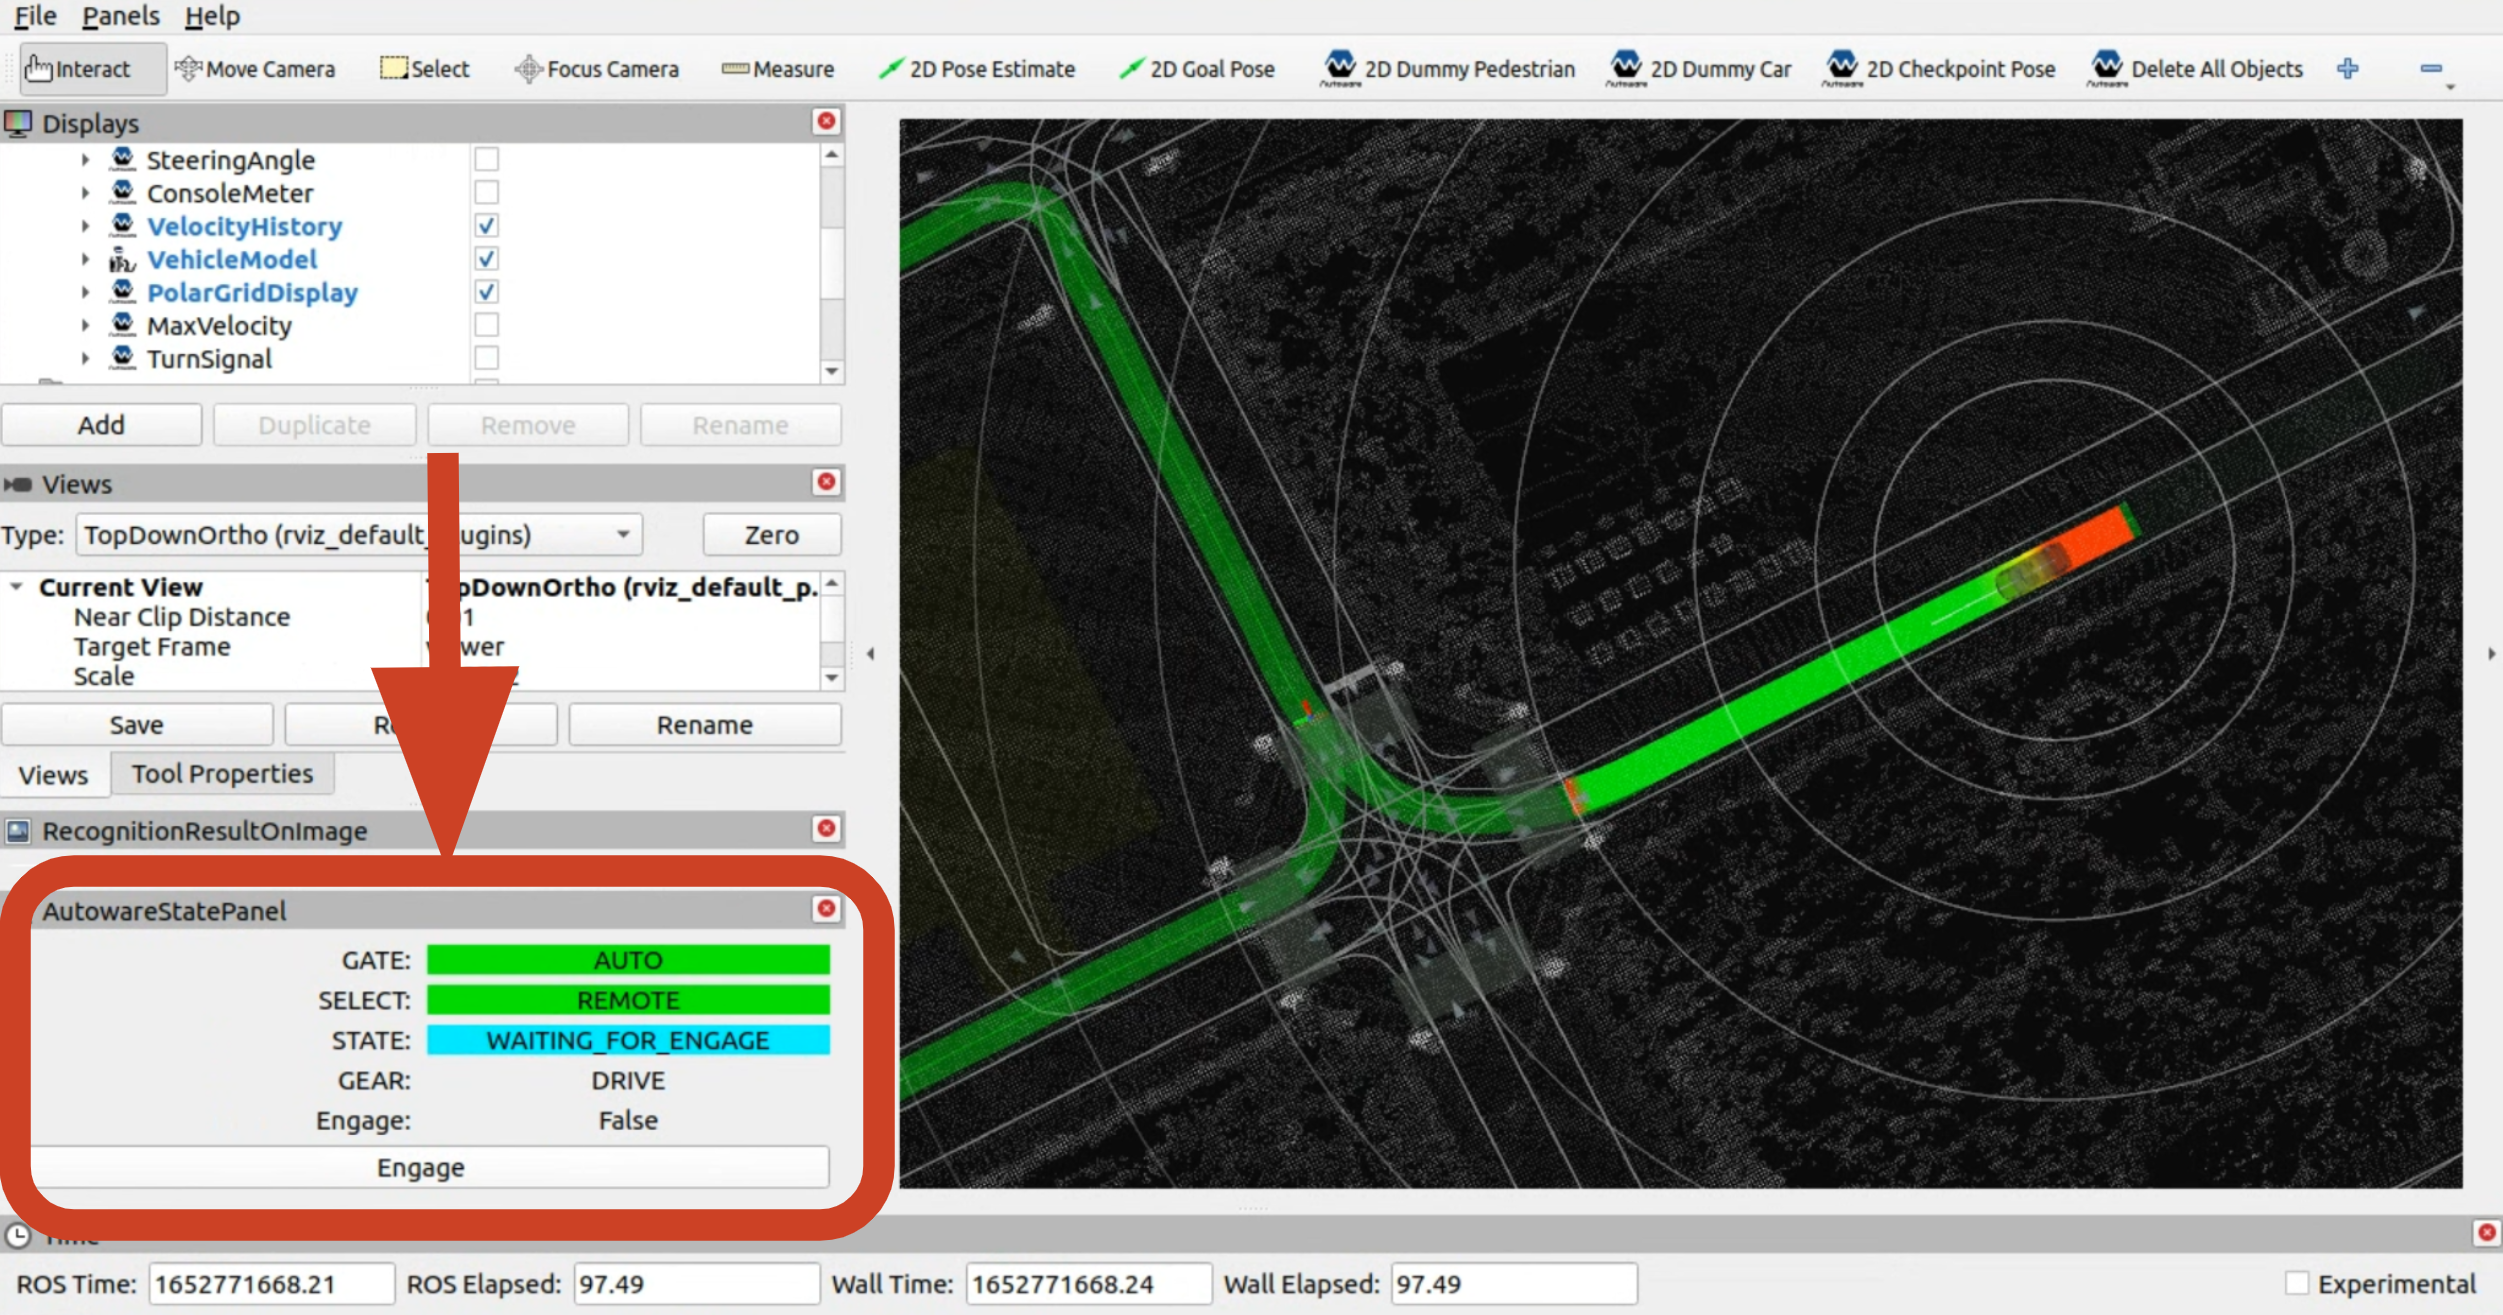
You can also engage via RViz with "AutowareStatePanel".
The panel can be found in Panels > Add New Panel > tier4_state_rviz_plugin > AutowareStatePanel.
Now the vehicle should drive along the calculated path!
7. Tune parameters for your vehicle & environment#
You may need to tune your parameters depending on the domain in which you will operate your vehicle.
8. Customize your own package based on Autoware-msgs / Autoware-package#
In many practical applications, apart from the available nodes / modules of Autoware, you may have the need to create your own packages which communicate with Autoware nodes or utilize some Autoware implementations (such like math methods including A-star, interpolation, mpc algorithm and so on). In this case, you can follow the instructions below to customize your specific package.
Package using Autoware-msgs#
Since Autoware is built on ROS (Autoware Universe / Autoware Core on ROS 2), if you have the urge to communicate with other Autoware nodes, then you are supposed to obey the rule of node subscribing / publishing messages via topic in specified message type. For details, refer to the ROS Tutorial.
If you are already experienced at ROS, then it's simple to do such an extension just like the following example. Here, as mentioned in section 5.1 above, how could vehicle interface package (such as driving-by-wire module) receives the control command? You can do:
- Put the "autoware_auto_control_msgs" in your project with your own packages together
- Add the "depend" tag in "package.xml" of your package which receives the control command
<depend>autoware_auto_control_msgs</depend>
- Add message path in "CMakeLists.txt"
find_package(autoware_auto_control_msgs)
- Include the header file of the message type and start coding
#include <autoware_auto_control_msgs/msg/ackermann_control_command.hpp>
Package using Autoware-package#
For the current Autoware Universe (or Autoware Core later) based on ROS 2, the DDS (data distribution service) is applied as the middleware for real-time communication. Thus, it is not necessary for you to use ROS 2 for customization, as long as your platform has the ability to utilize the same DDS middleware to communicate with Autoware nodes. More in details, the extension could be divided into 2 aspects:
Customization in ROS 2#
In this case, the extension is just as simple as above. Here, the package "interpolation" is used as an example:
- Put the "interpolation" in your project with your own packages together
- Add the "depend" tag in "package.xml" of your package which receives the control command
<depend>interpolation</depend>
- Add message path in "CMakeLists.txt"
find_package(interpolation)
- Include the header file of the message type and start coding
#include "interpolation/linear_interpolation.hpp"
Customization in other platforms#
In this case, the compiled package shall be considered as a dynamic link library and could be linked with any project. You can configure the compile options, for example in "CMakeLists.txt":
target_include_directories(${node_name} PRIVATE /autoware/install/interpolation/include)
target_link_directories(${node_name} PRIVATE /autoware/install/interpolation/lib)
target_link_libraries(${node_name} PUBLIC interpolation)
Remember to replace the "${node_name}" with the correct name. And then you can include the header file and start coding
#include "interpolation/linear_interpolation.hpp"
If you have any issues or questions, feel free to create an Autoware Foundation GitHub Discussion in the Q&A category!