Planning simulation#
Preparation#
Download and unpack a sample map.
- You can also download the map manually.
gdown -O ~/autoware_map/ 'https://docs.google.com/uc?export=download&id=1499_nsbUbIeturZaDj7jhUownh5fvXHd'
unzip -d ~/autoware_map ~/autoware_map/sample-map-planning.zip
Note
Sample map: Copyright 2020 TIER IV, Inc.
Basic simulations#
Lane driving scenario#
1. Launch Autoware#
source ~/autoware/install/setup.bash
ros2 launch autoware_launch planning_simulator.launch.xml map_path:=$HOME/autoware_map/sample-map-planning vehicle_model:=sample_vehicle sensor_model:=sample_sensor_kit
Warning
Note that you cannot use ~ instead of $HOME here.
If ~ is used, the map will fail to load.
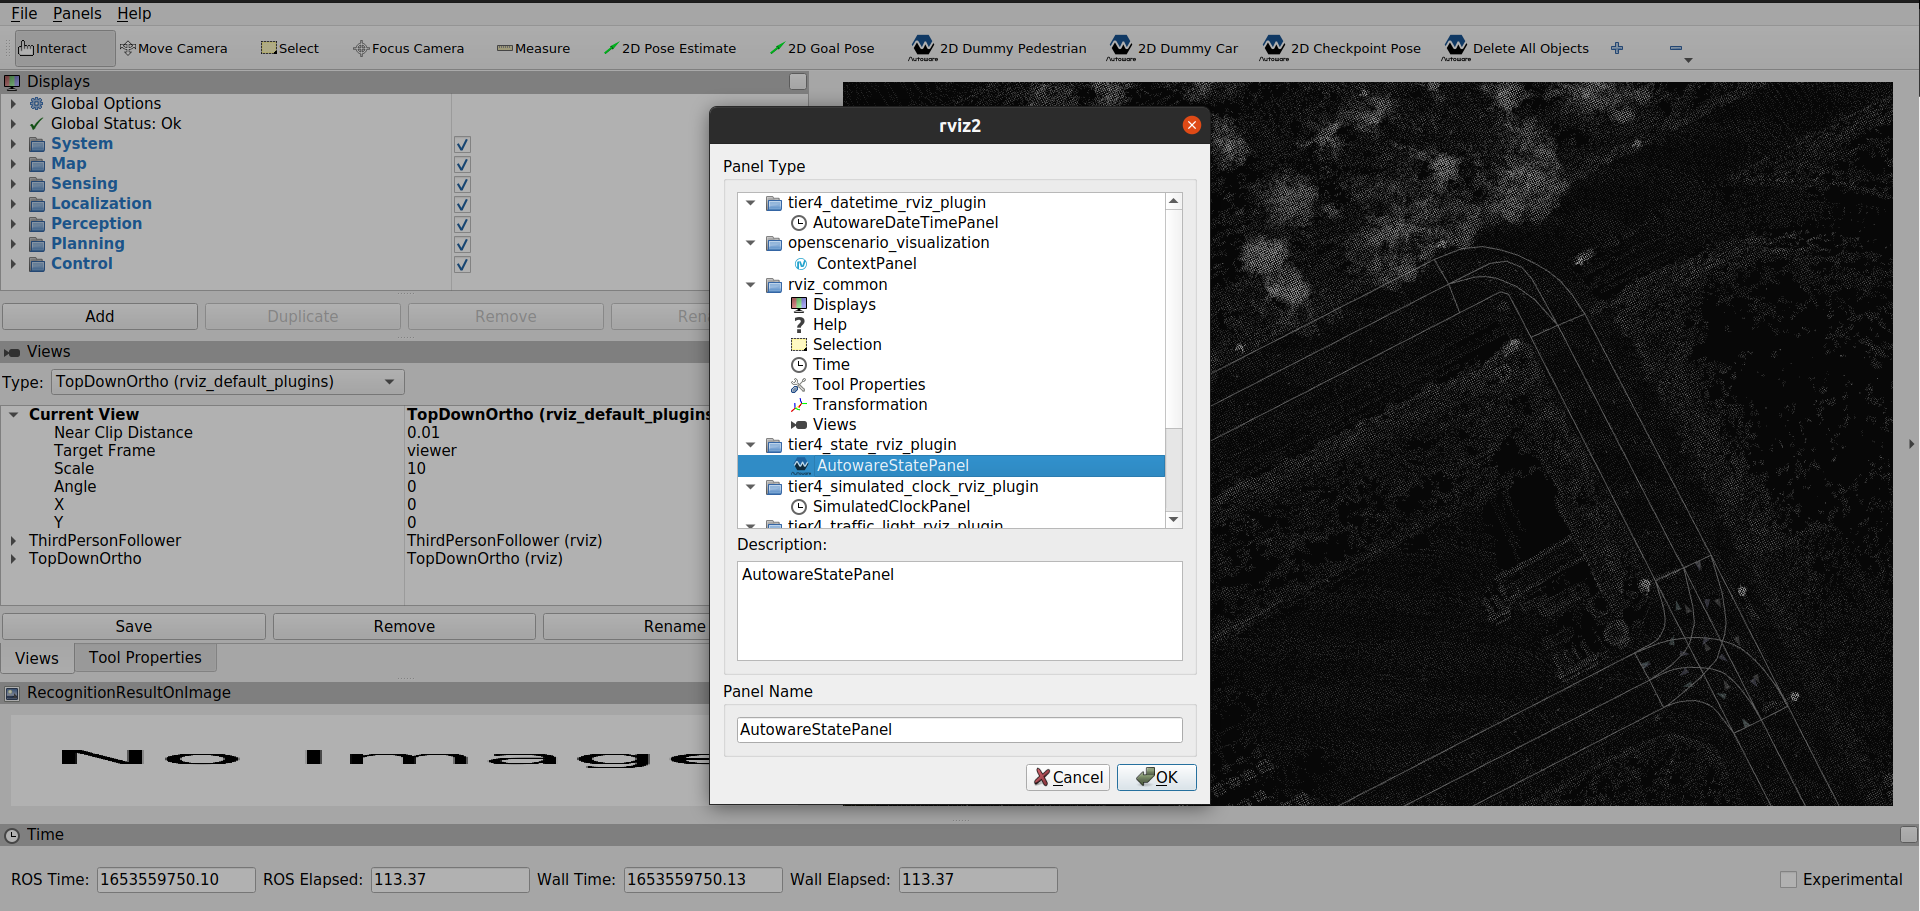
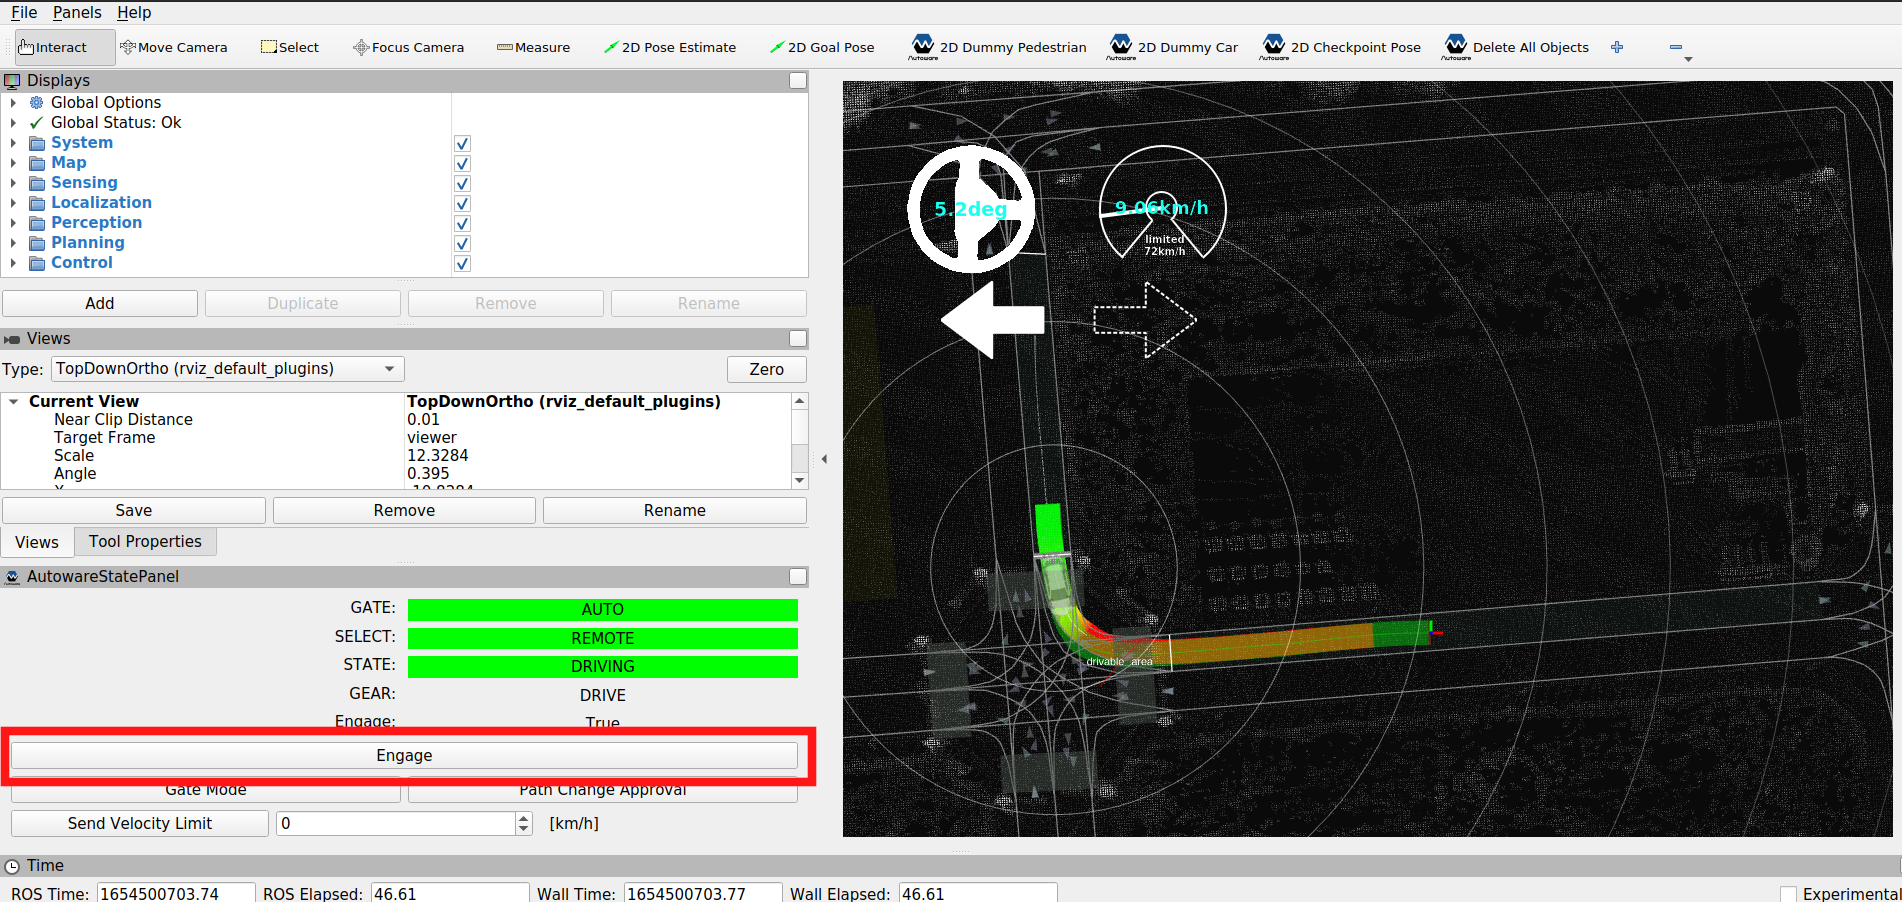
2. Add Autoware State Panel#
This panel is useful when running planning simulations. To add the panel, click Panels -> Add new panel, select AutowareStatePanel, and then click OK.
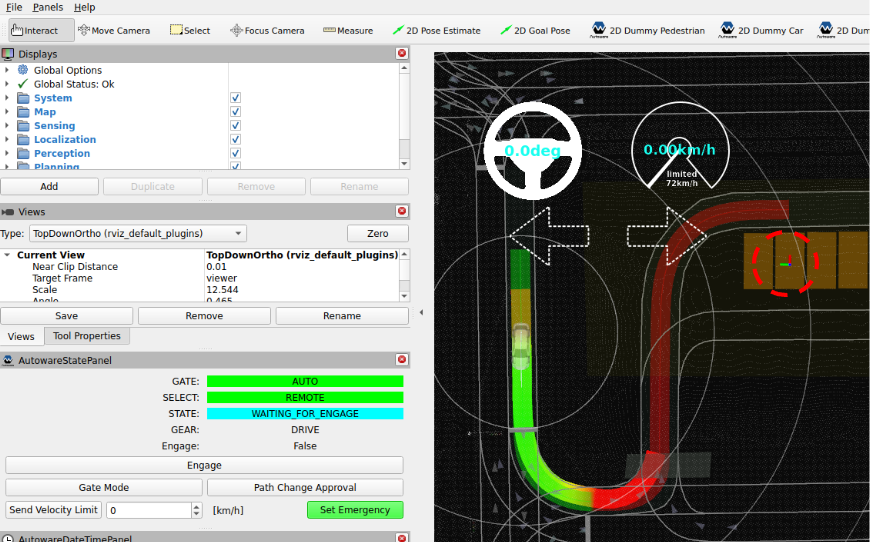
3. Set an initial pose for the ego vehicle#
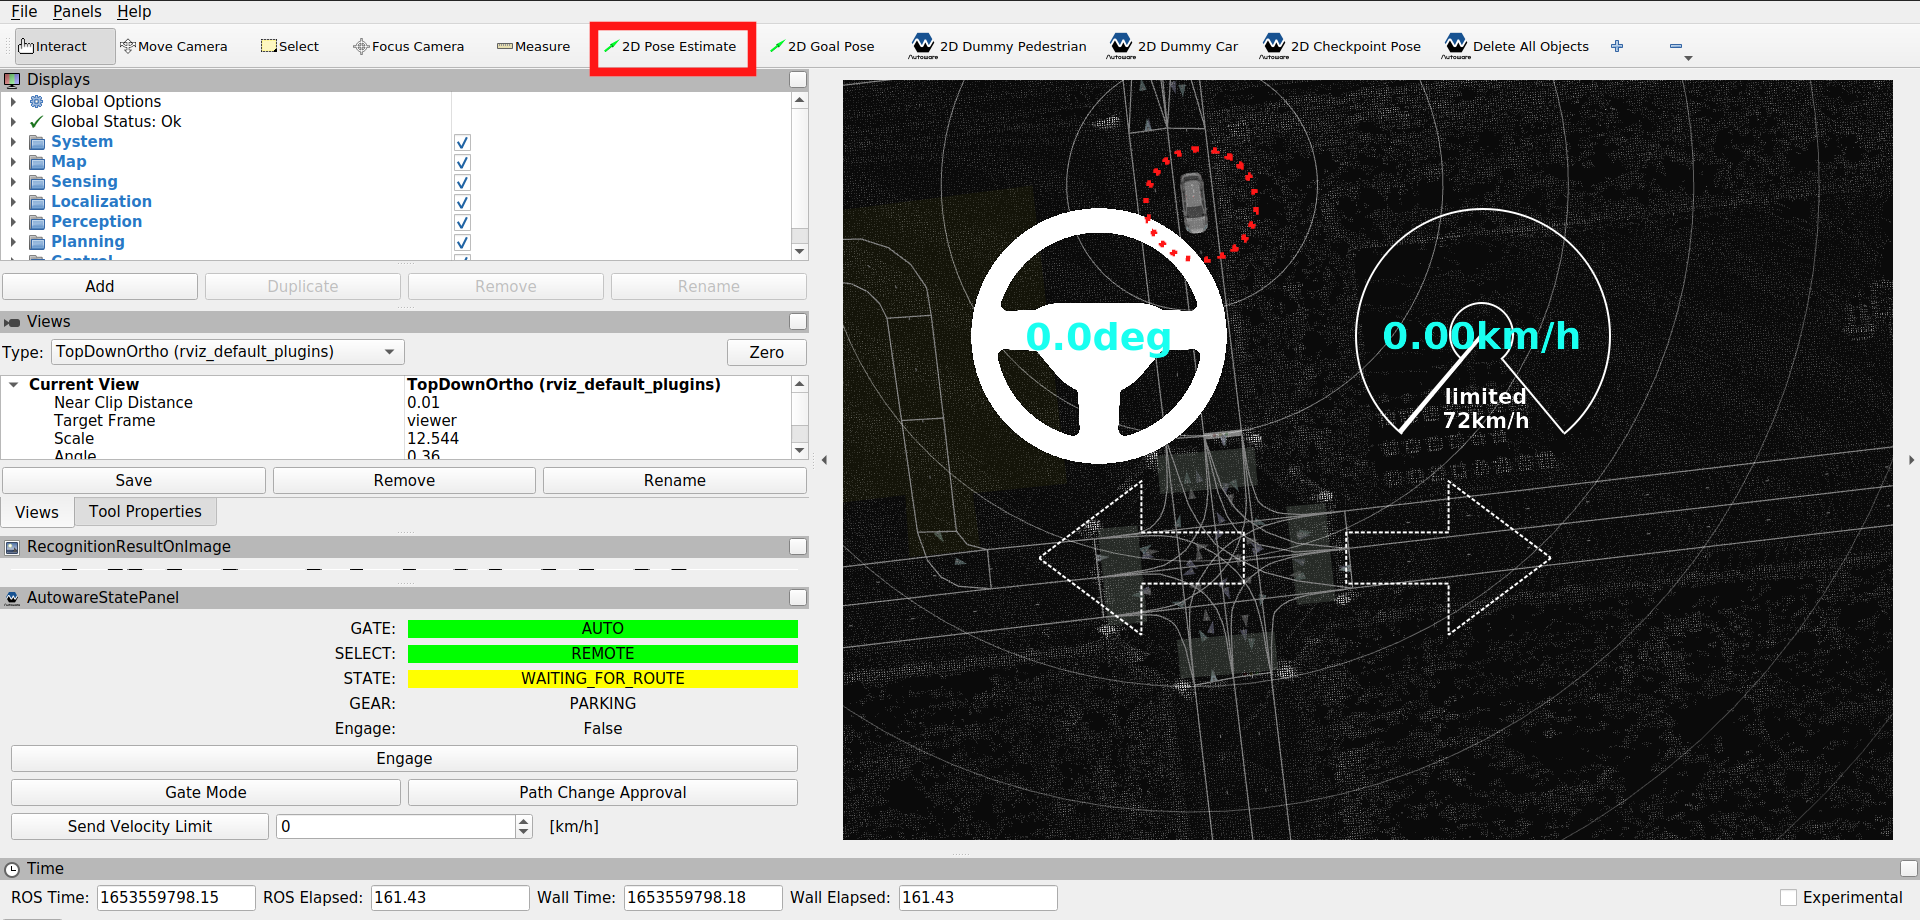
a) Click the 2D Pose estimate button in the toolbar, or hit the P key.
b) In the 3D View pane, click and hold the left-mouse button, and then drag to set the direction for the initial pose. An image representing the vehicle should now be displayed.
Warning
Remember to set the initial pose of the car in the same direction as the lane.
To confirm the direction of the lane, check the arrowheads displayed on the map.
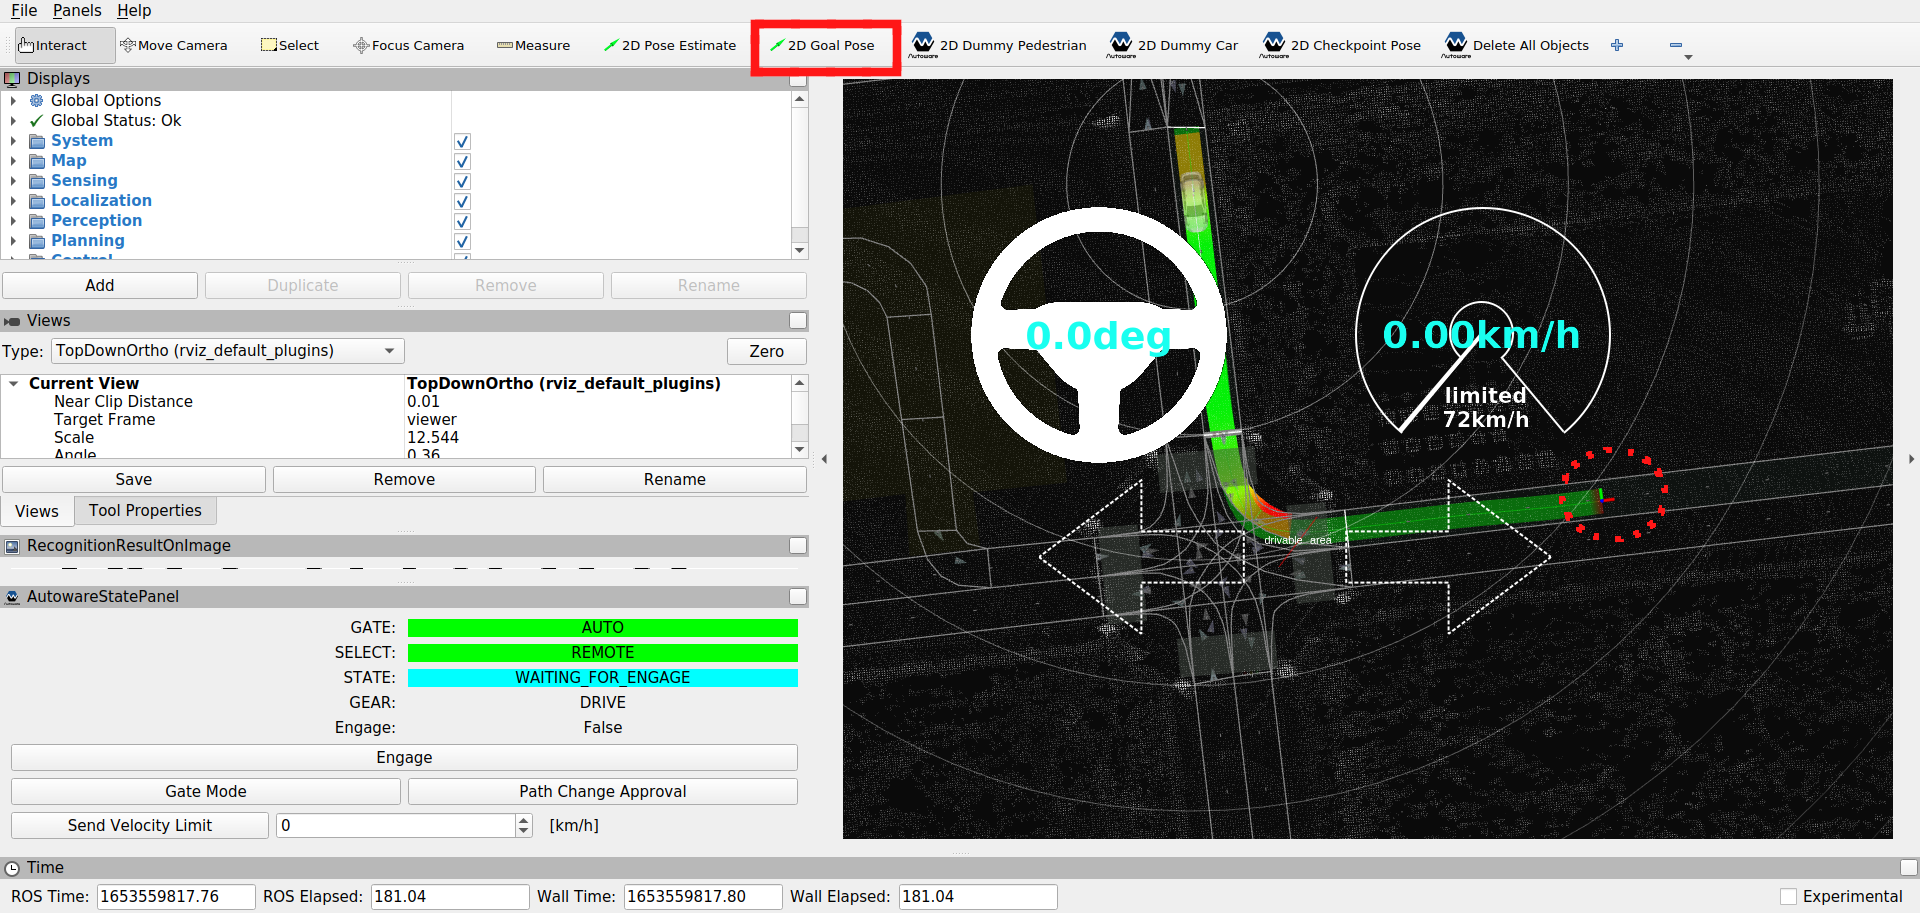
4. Set a goal pose for the ego vehicle#
a) Click the 2D Goal Pose button in the toolbar, or hit the G key.
b) In the 3D View pane, click and hold the left-mouse button, and then drag to set the direction for the goal pose. If done correctly, you will see a planned path from initial pose to goal pose.
5. Engage the ego vehicle#
Now you can start the ego vehicle driving by clicking the Engage button in AutowareStatePanel. Alteratively, you can manually engage the vehicle by running the following command:
source ~/autoware/install/setup.bash
ros2 topic pub /autoware/engage autoware_auto_vehicle_msgs/msg/Engage "engage: true" -1
Parking scenario#
-
Set an initial pose and a goal pose, and engage the ego vehicle.
-
When the vehicle approaches the goal, it will switch from lane driving mode to parking mode.
-
After that, the vehicle will reverse into the destination parking spot.
Advanced Simulations#
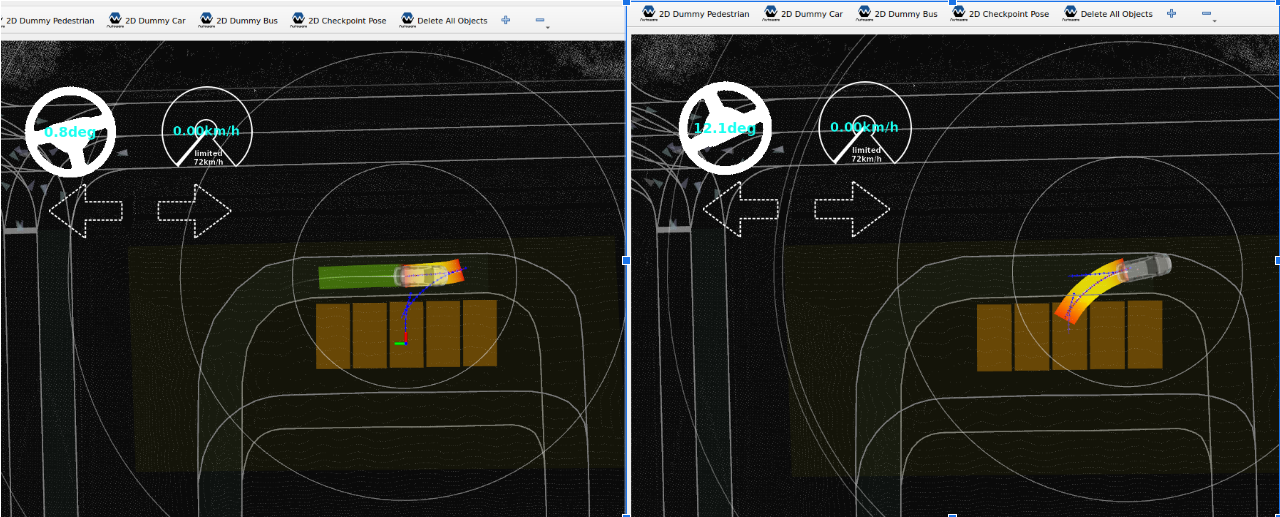
Placing dummy objects#
- Click the
2D Dummy Caror2D Dummy Pedestrianbutton in the toolbar. - Set the pose of the dummy object by clicking and dragging on the map.
-
Set the velocity of the object in
Tool Properties -> 2D Dummy Car/Pedestrianpanel.!!! note
Changes to the
velocityparameter will only affect objects placed after the parameter is changed.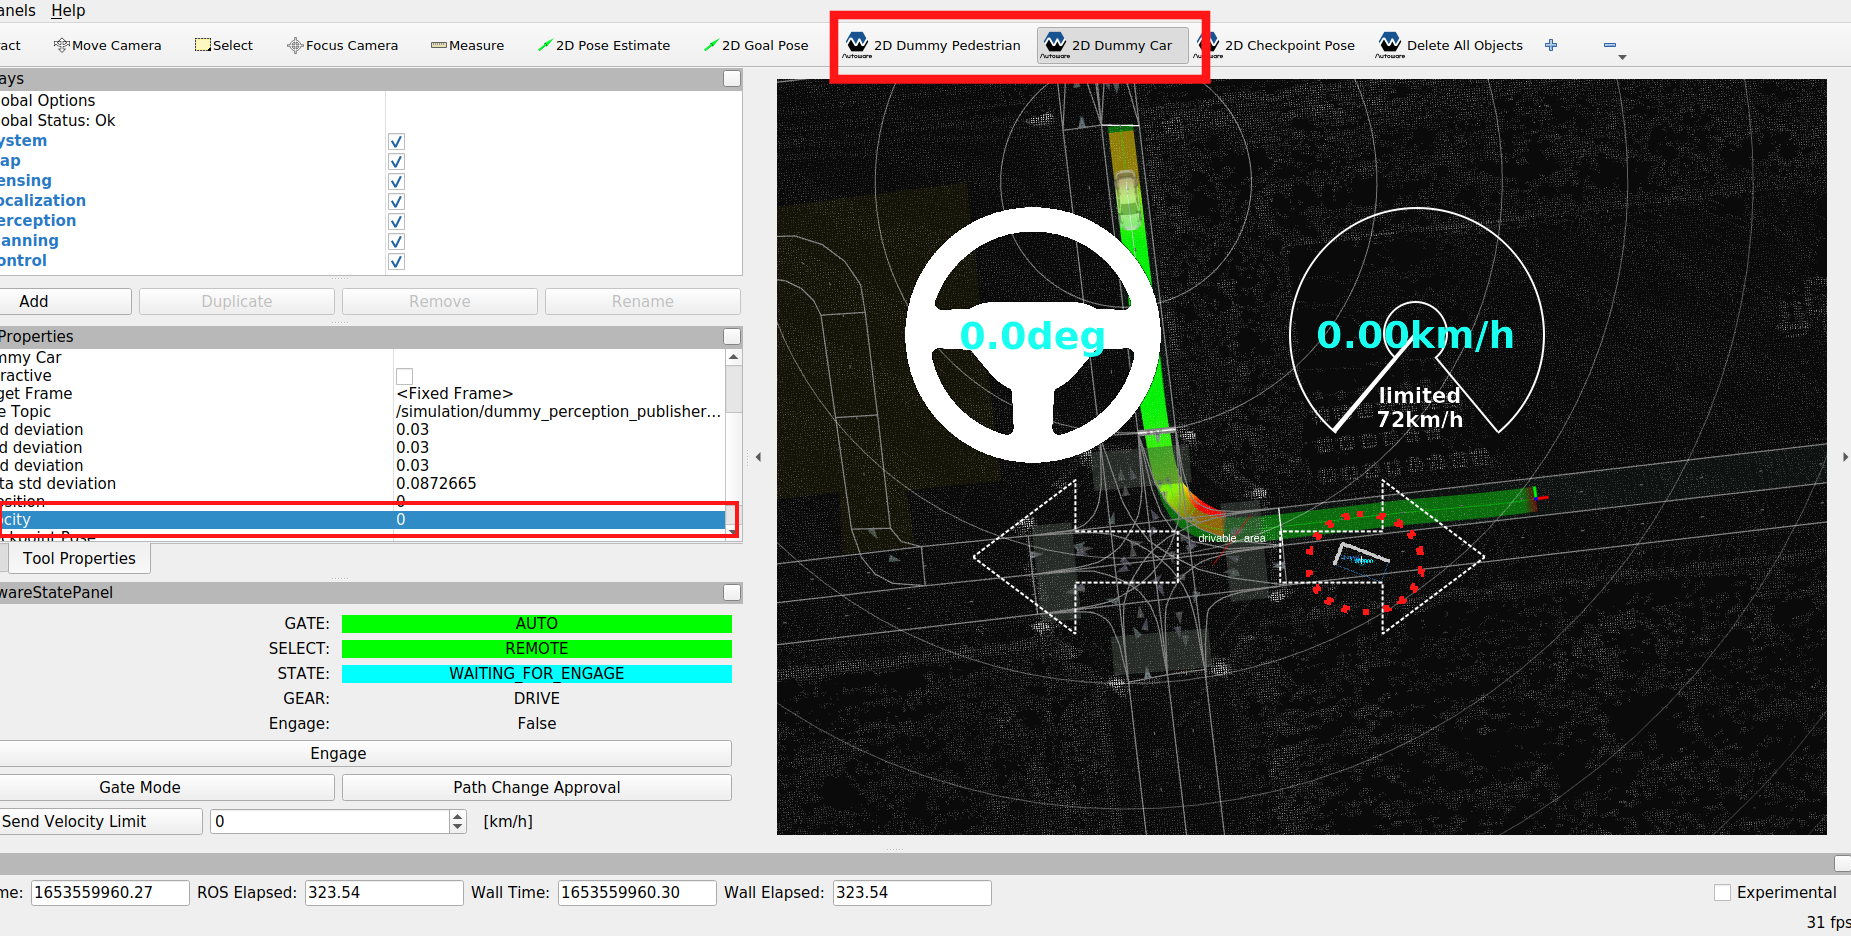
-
Delete any dummy objects placed in the view by clicking the
Delete All Objectsbutton in the toolbar. -
Click the
Interactivebutton in the toolbar to make the dummy object interactive.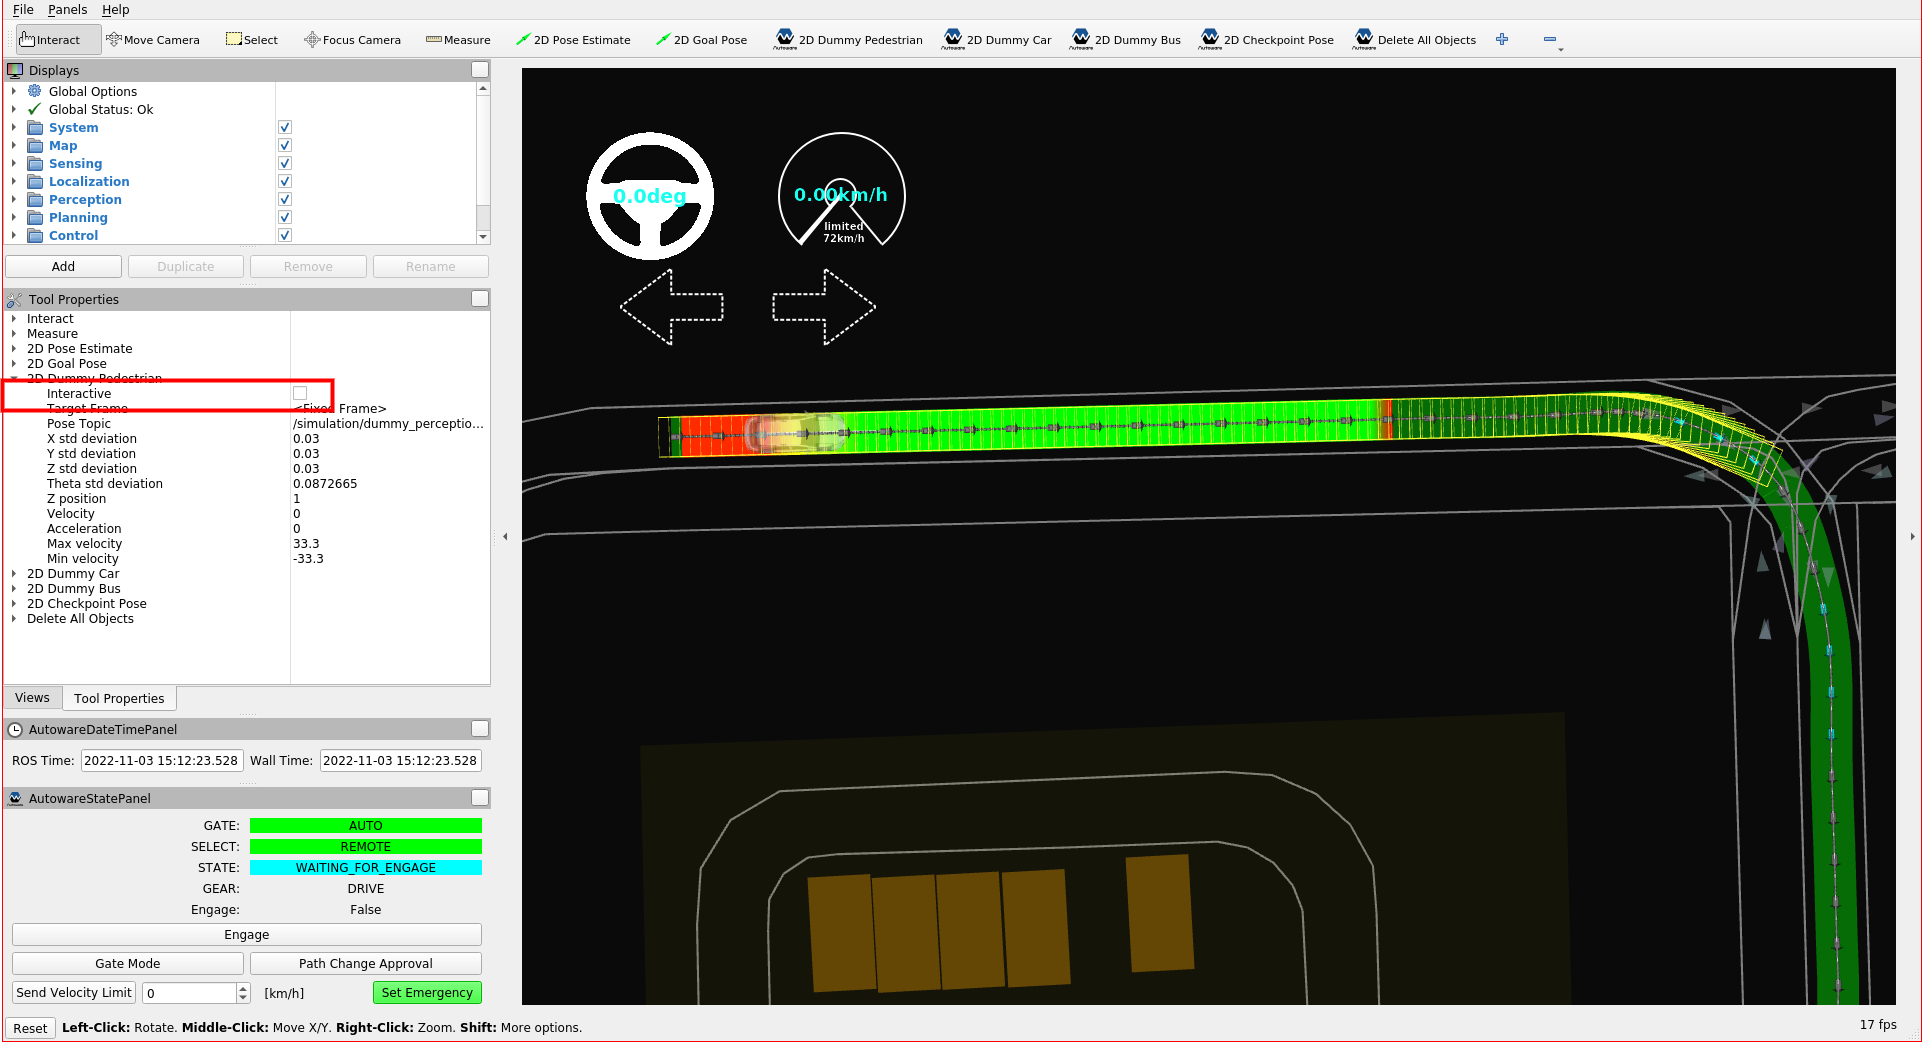
-
For adding an interactive dummy object, press
SHIFTand click theright click. - For deleting an interactive dummy object, press
ALTand click theright click. -
For moving an interactive dummy object, hold the
right clickdrag and drop the object.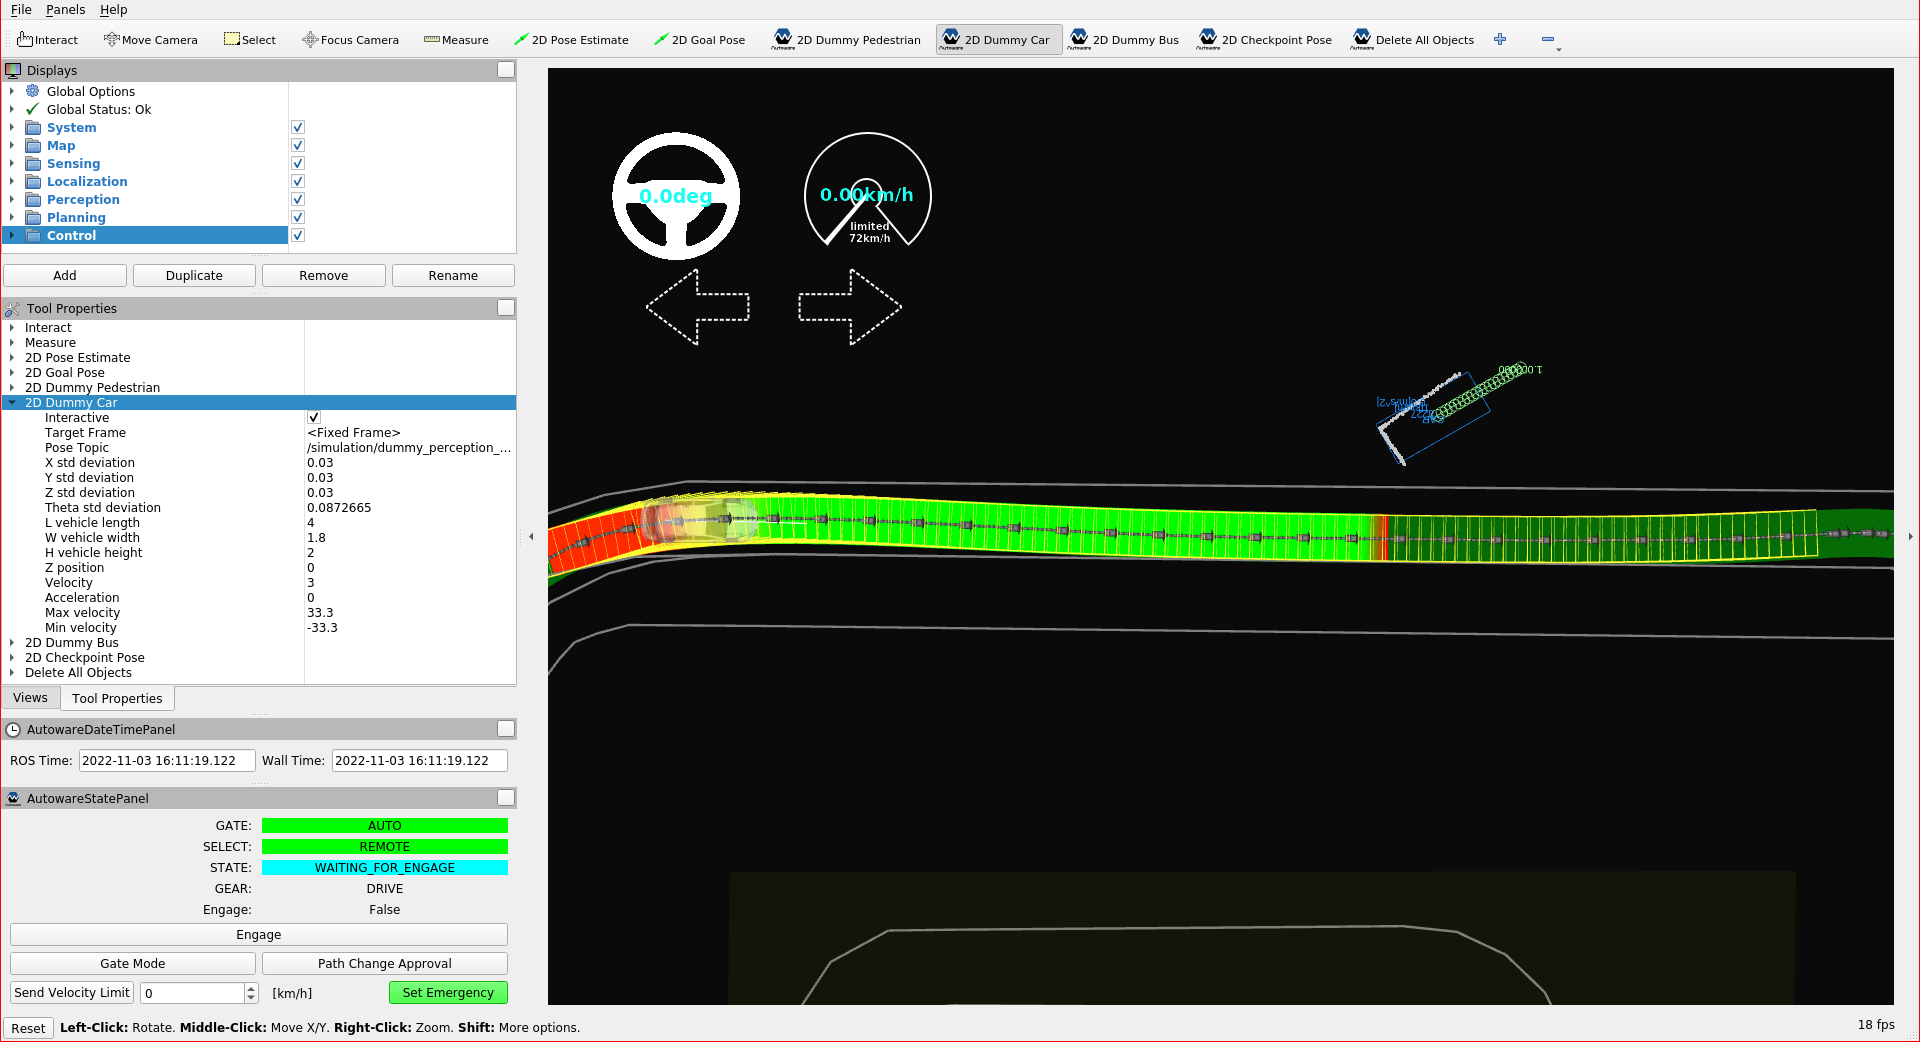
Traffic light recognition simulation#
By default, traffic lights on the map are all treated as if they are set to green. As a result, when a path is created that passed through an intersection with a traffic light, the ego vehicle will drive through the intersection without stopping.
The following steps explain how to set and reset traffic lights in order to test how the Planning component will respond.
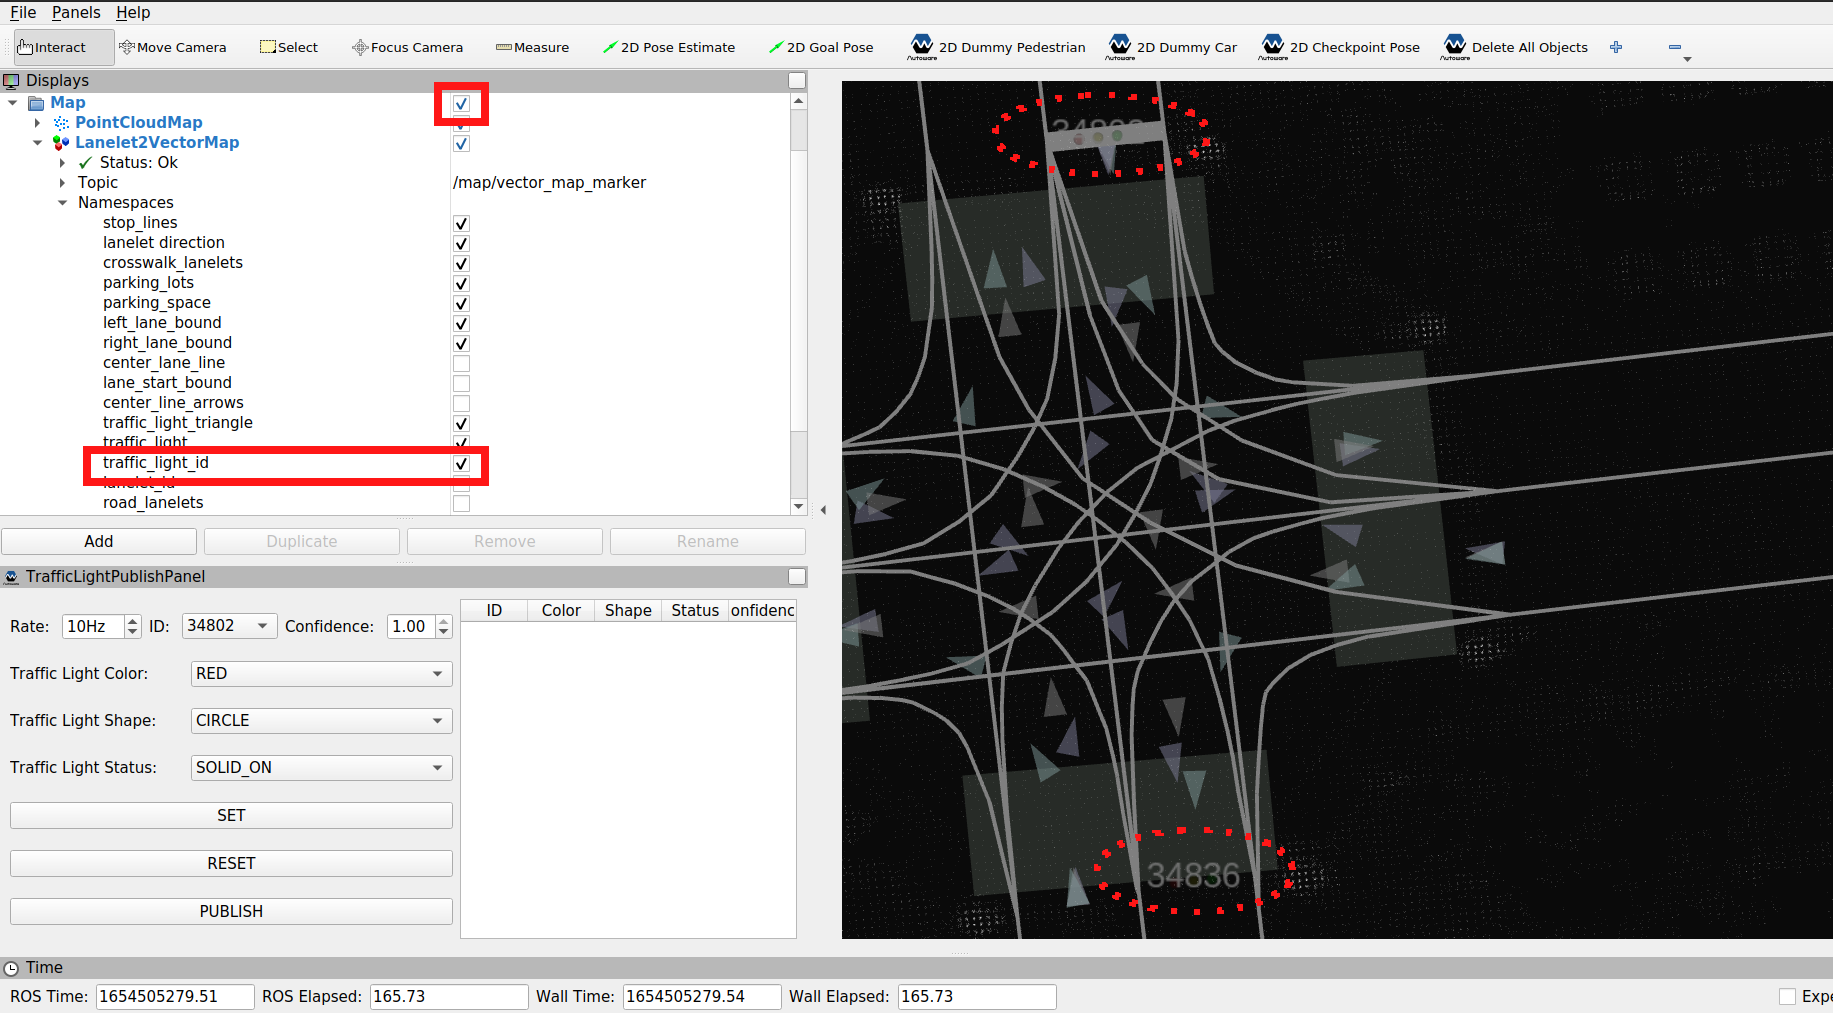
Set traffic light#
-
Go to
Panels -> Add new panel, selectTrafficLightPublishPanel, and then pressOK. -
In
TrafficLightPublishPanel, set theIDand color of the traffic light. -
Click the
SETbutton.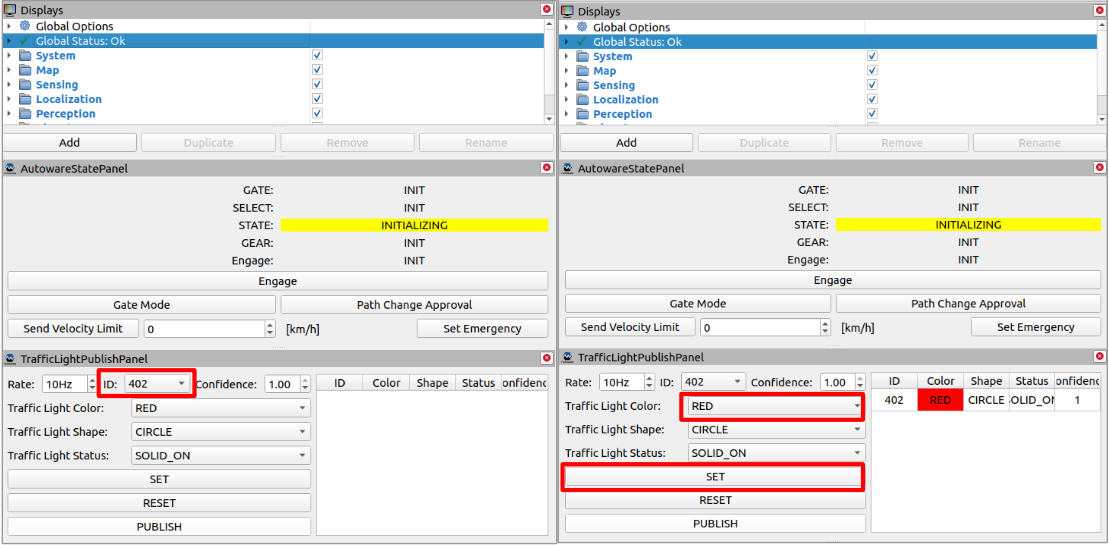
-
Finally, click the
PUBLISHbutton to send the traffic light status to the simulator. Any planned path that goes past the selected traffic light will then change accordingly.
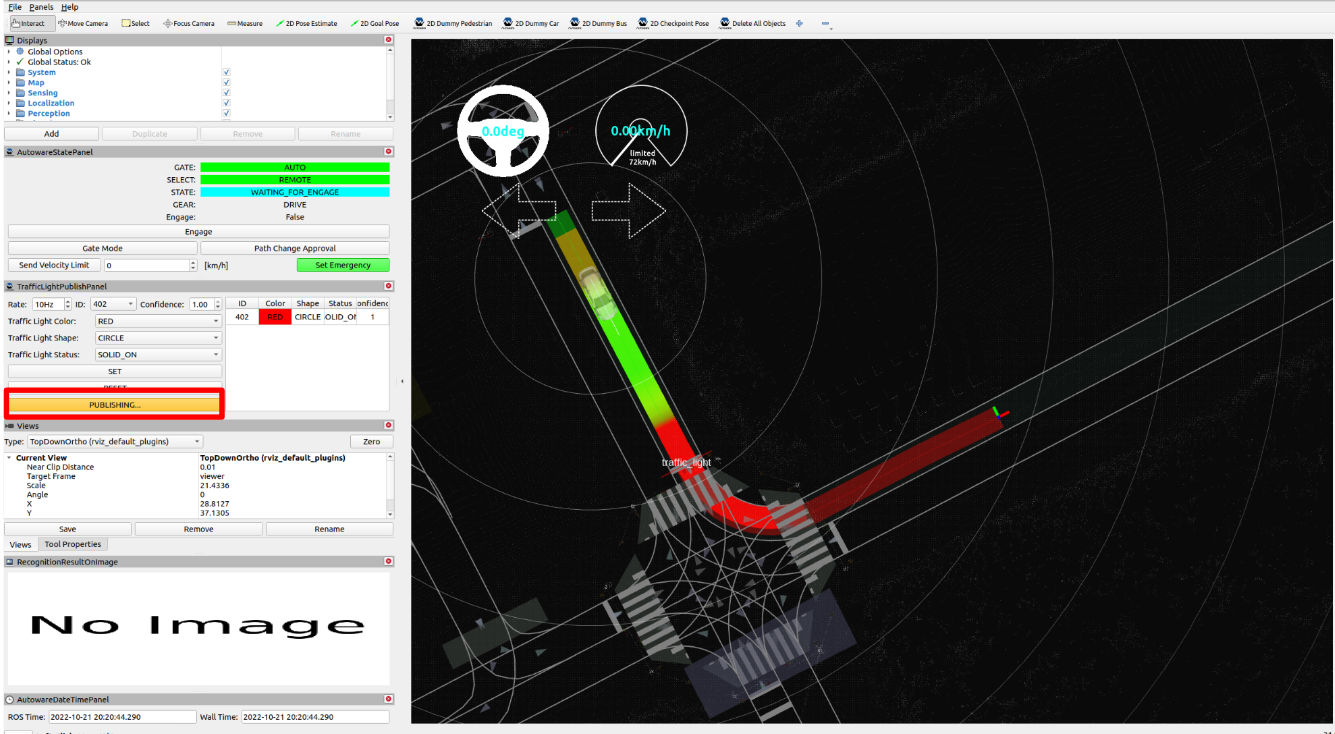
By default, Rviz should display the ID of each traffic light on the map. You can have a closer look at the IDs by zooming in the region or by changing the View type.
In case the IDs are not displayed, try the following troubleshooting steps:
a) In the Displays panel, find the traffic_light_id topic by toggling the triangle icons next to Map > Lanelet2VectorMap > Namespaces.
b) Check the traffic_light_id checkbox.
c) Reload the topic by clicking the Map checkbox twice.
Update/Reset traffic light#
You can update the color of the traffic light by selecting the next color (in the image it is GREEN) and clicking SET button. In the image the traffic light in front of the ego vehicle changed from RED to GREEN and the vehicle restarted.
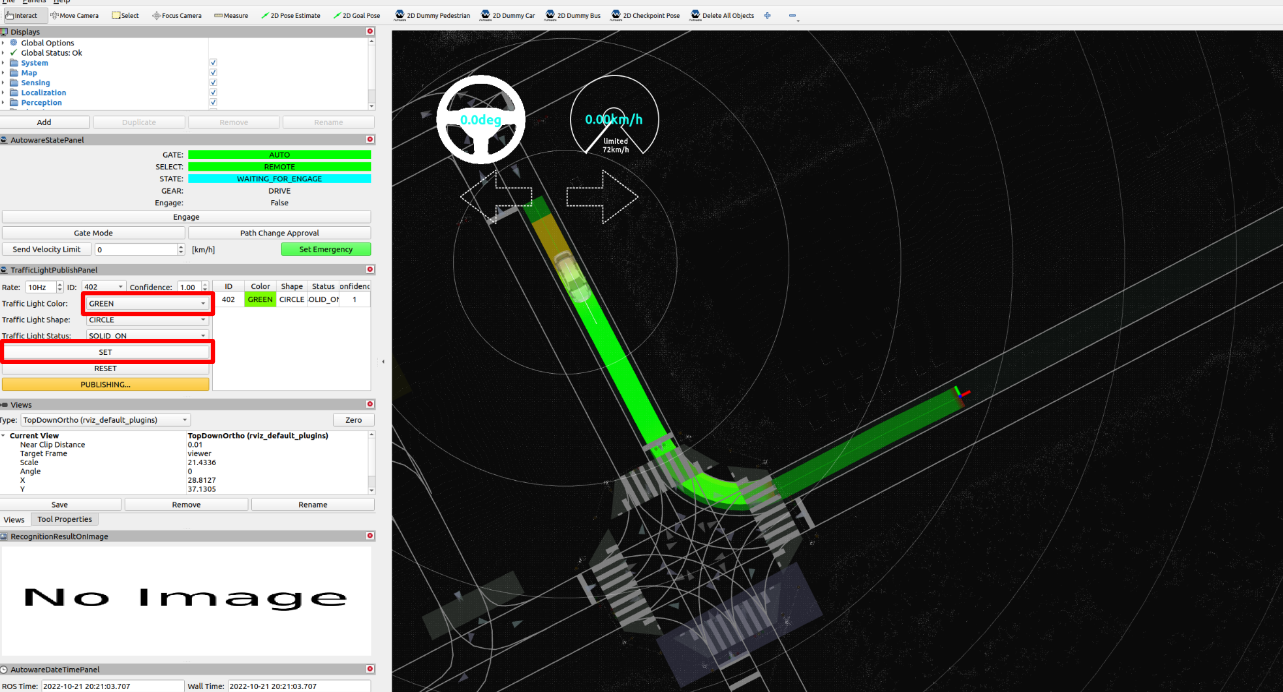
To remove a traffic light from TrafficLightPublishPanel, click the RESET button.