Creating a Lanelet#
At this page, we will explain how to create a simple lanelet on your point cloud map. If you didn't have a point cloud map before, please check and follow the steps on the LIO-SAM mapping page for how to create a point cloud map for Autoware.
Creating a Lanelet2#
Firstly, we need to import our pointcloud map to Vector Map Builder tool:
- Please click
File. - Then, click
Import PCD. - Click
Browseand select your .pcd file.
You will display the point cloud on your Vector Map Builder tool after the upload is complete:
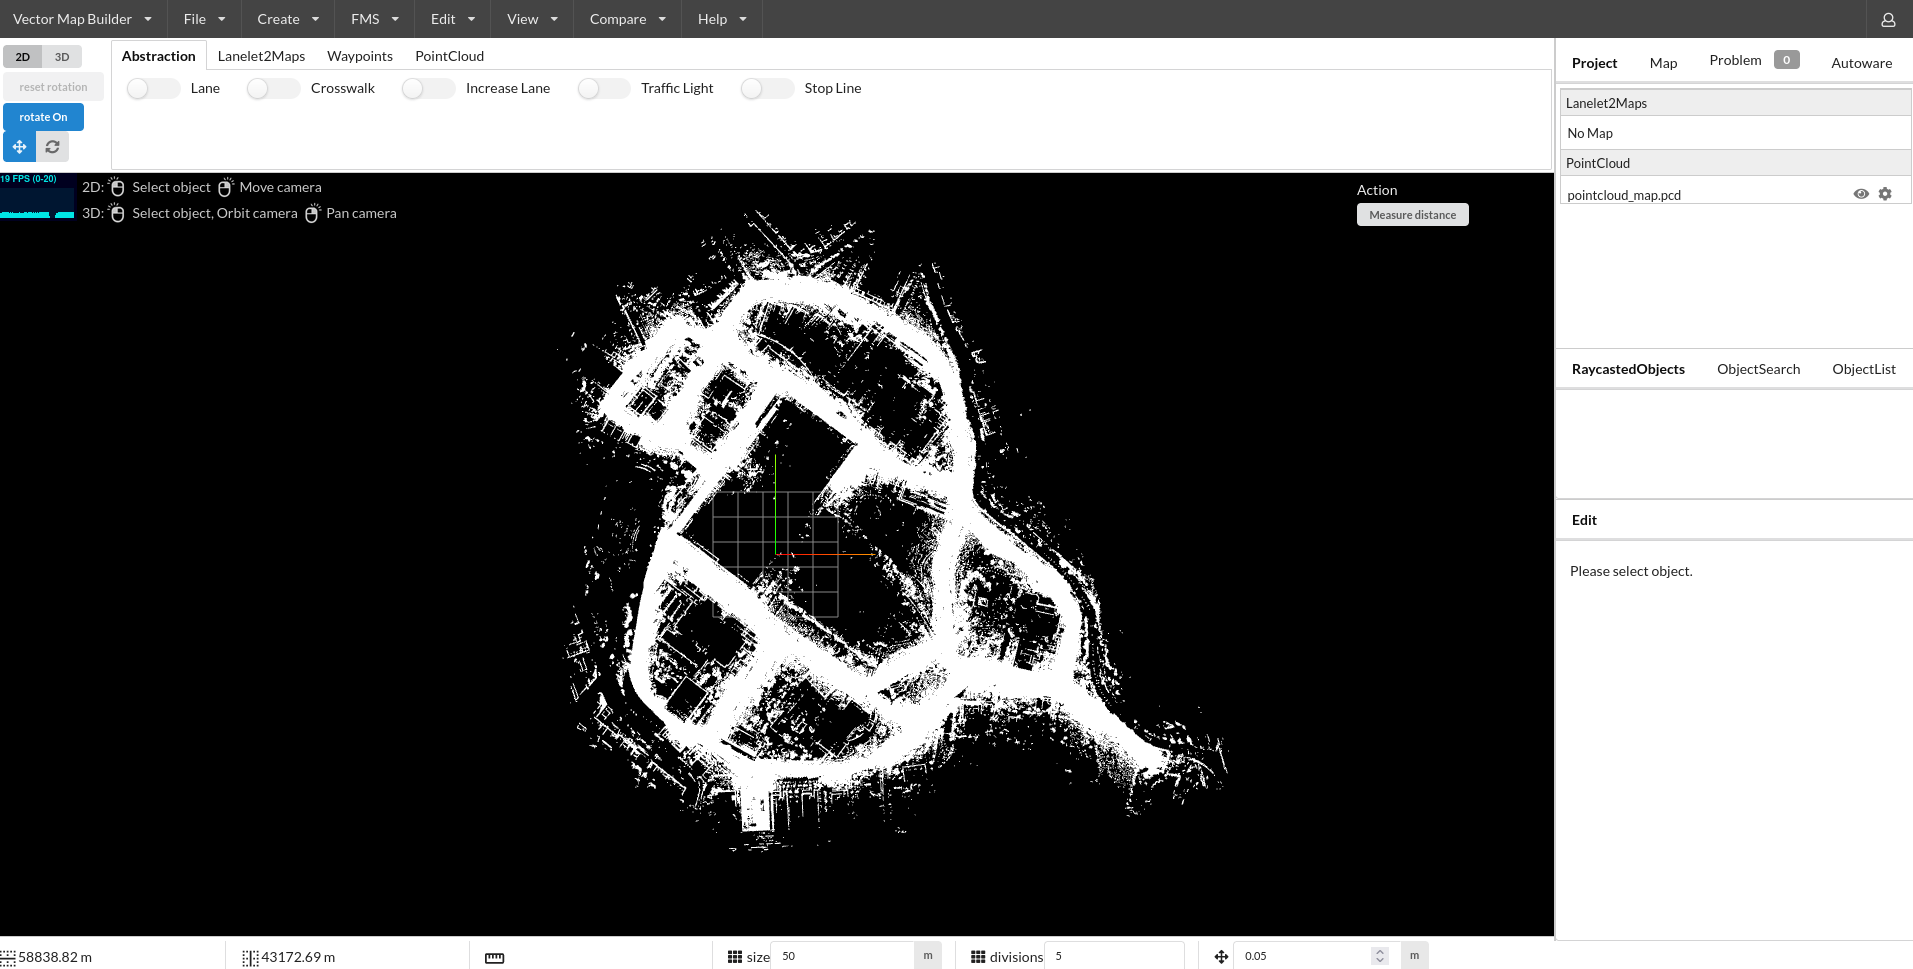
Now, we are ready to create lanelet2 map on our pointcloud map:
- Please click
Create. - Then, click
Create Lanelet2Maps. - Please fill your map name
- Please fill your MGRS zone. (At tutorial_vehicle, MGRS grid zone: 35T - MGRS 100,000-meter square: PF)
- Click
Create.
Creating a simple lanelet#
In order to create a simple lanelet on your map, please follow these steps:
- CLick
Lanelet2Mapson the bar - Enable Lanelet mode via selecting
Lanelet. - Then, you can click the pointcloud map to create lanelet.
- If your lanelet is finished, you can disable
Lanelet. - If you want to change your lanelet width, click
lanelet-->Change Lanelet Width, then you can enter the lanelet width.
Video Demonstration:
Join two lanelets#
In order to join two lanelets, please follow these steps:
- Please create two distinct lanelet.
- Select a Lanelet, then press
Shiftand select other lanelet. - Now, you can see
Join Laneletsbutton, just press it. - These lanelets will be joined.
Video Demonstration:
Join Multiple lanelets#
In order to add (join) two or more lanelets to another lanelet, please follow these steps:
- Create multiple lanelets.
- You can join the first two lanelets like the steps before.
- Please check end points ids of first lanelet.
- Then you need to change these ids with third lanelet's start point. (Please change with selecting linestring of lanelet)
- You will see two next lanes of the first lanelet will be appeared.
Video Demonstration:
Change Speed Limit Of Lanelet#
In order to change the speed limit of lanelet, please follow these steps:
- Select the lanelet where the speed limit will be changed
- Set
speed limiton the right panel.
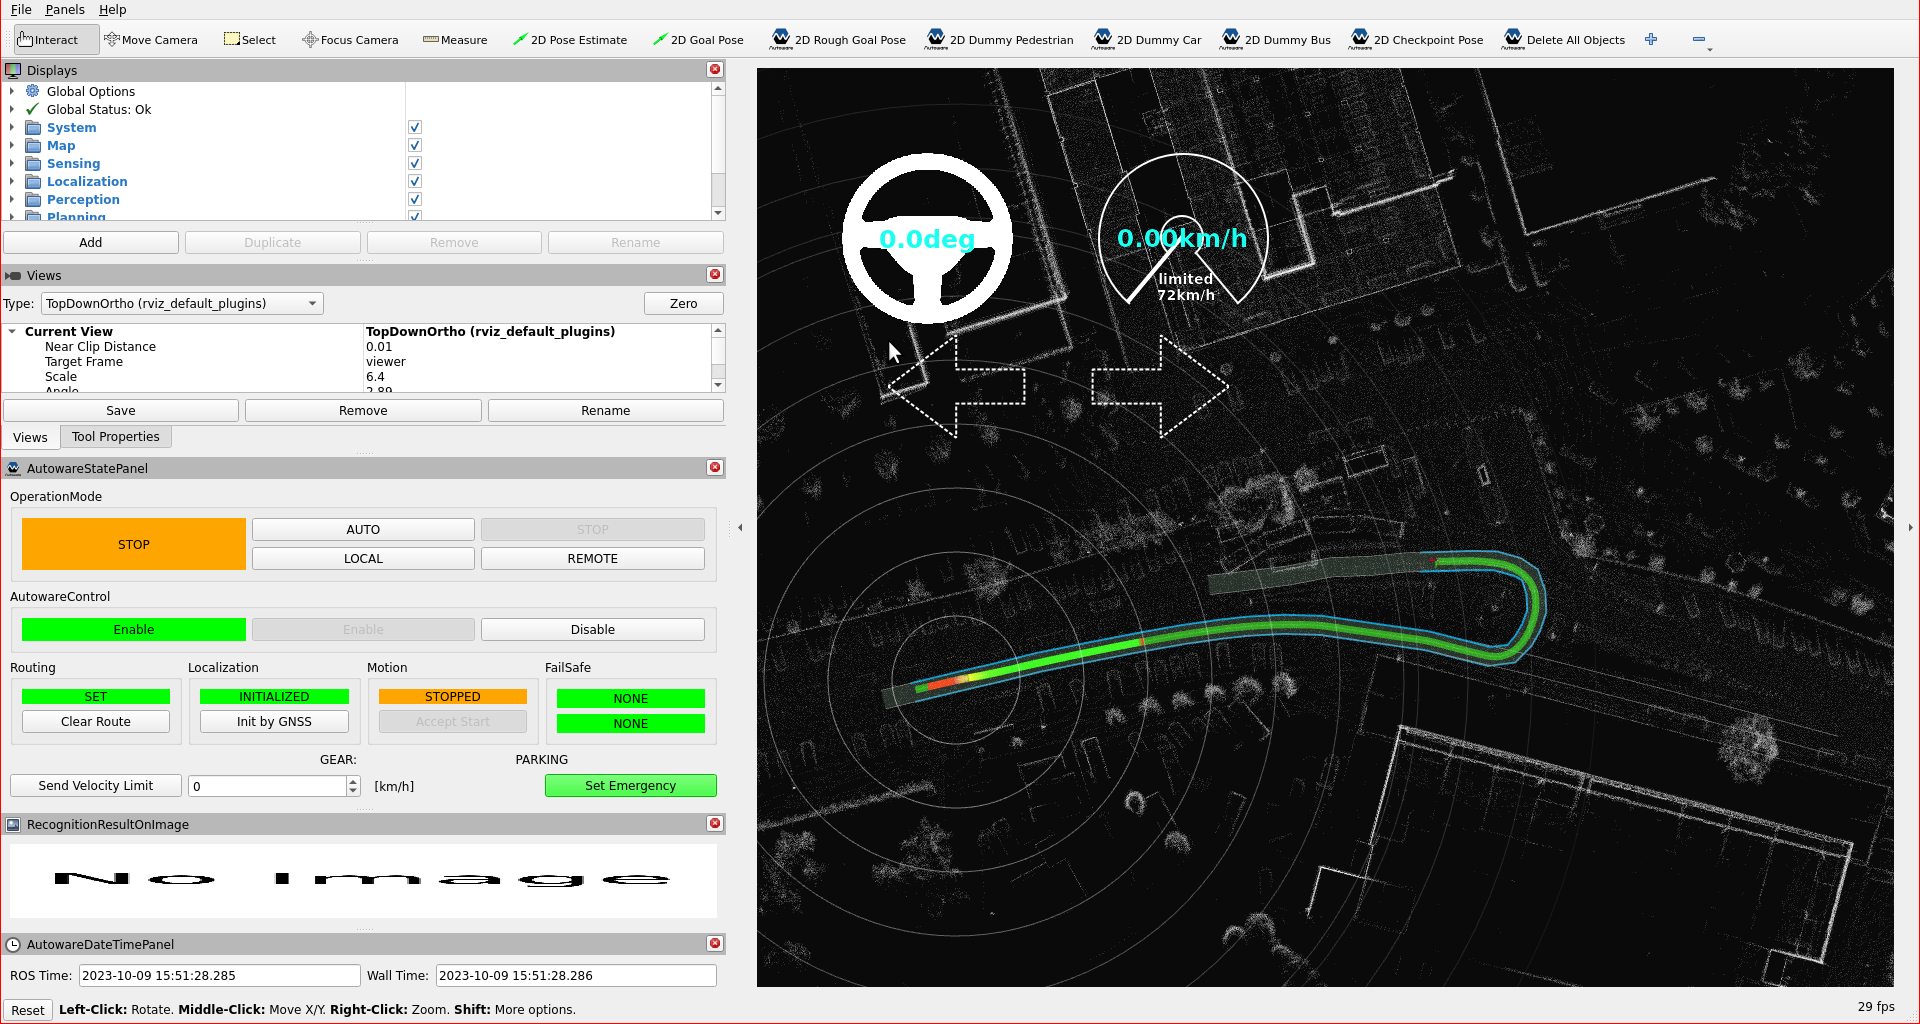
Test lanelets with planning simulator#
After the completing of creating lanelets, we need to save it.
To that please click File --> Export Lanelet2Maps then download.
After the download is finished, we need to put lanelet2 map and pointcloud map on the same location. The directory structure should be like this:
<YOUR-MAP-DIRECTORY>/
 ├─ pointcloud_map.pcd
 └─ lanelet2_map.osm
If your .osm or .pcd map file's name is different from these names, you need to update autoware.launch.xml:
  <!-- Map -->
-  <arg name="lanelet2_map_file" default="lanelet2_map.osm" description="lanelet2 map file name"/>
+  <arg name="lanelet2_map_file" default="<YOUR-LANELET-MAP-NAME>.osm" description="lanelet2 map file name"/>
-  <arg name="pointcloud_map_file" default="pointcloud_map.pcd" description="pointcloud map file name"/>
+  <arg name="pointcloud_map_file" default="<YOUR-POINTCLOUD-MAP-NAME>.pcd" description="pointcloud map file name"/>
Now we are ready to launch the planning simulator:
ros2 launch autoware_launch planning_simulator.launch.xml map_path:=<YOUR-MAP-FOLDER-DIR> vehicle_model:=<YOUR-VEHICLE-MODEL> sensor_model:=<YOUR-SENSOR-KIT>
Example for tutorial_vehicle:
ros2 launch autoware_launch planning_simulator.launch.xml map_path:=$HOME/Files/autoware_map/tutorial_map/ vehicle_model:=tutorial_vehicle sensor_model:=tutorial_vehicle_sensor_kit vehicle_id:=tutorial_vehicle
- Click
2D Pose Estimatebutton on rviz or pressPand give a pose for initialization. - Click
2D Goal Posebutton on rviz or pressGand give a pose for goal point.