Launch Autoware#
This section explains how to run your vehicle with Autoware. We will explain how to run and launch autoware with these modules:
Pre-requirements of launching Autoware with real vehicle#
Please complete these steps for integration Autoware on your vehicle:
- Create your Autoware meta-repository.
- Create your vehicle and sensor model.
- Calibrate your sensors.
- Create your Autoware compatible vehicle interface.
- Create your environment map.
After the completion of these steps according to your individual vehicle, you are ready to use Autoware.
autoware_launch package#
The autoware_launch package starts the initiation of Autoware software stack launch files. The autoware.launch.xml launch file enables the invocation of these module launches by enabling the following launch arguments:
  <arg name="launch_vehicle" default="true" description="launch vehicle"/>
  <arg name="launch_system" default="true" description="launch system"/>
  <arg name="launch_map" default="true" description="launch map"/>
  <arg name="launch_sensing" default="true" description="launch sensing"/>
  <arg name="launch_sensing_driver" default="true" description="launch sensing driver"/>
  <arg name="launch_localization" default="true" description="launch localization"/>
  <arg name="launch_perception" default="true" description="launch perception"/>
  <arg name="launch_planning" default="true" description="launch planning"/>
  <arg name="launch_control" default="true" description="launch control"/>
For example, if you don't need to launch perception, planning, and control for localization debug, you can disable these modules like the following:
-  <arg name="launch_perception" default="true" description="launch perception"/>
+  <arg name="launch_perception" default="false" description="launch perception"/>
-  <arg name="launch_planning" default="true" description="launch planning"/>
+  <arg name="launch_planning" default="false" description="launch planning"/>
-  <arg name="launch_control" default="true" description="launch control"/>
+  <arg name="launch_control" default="false" description="launch control"/>
Also, it is possible to specify which components to launch using command-line arguments.
ros2 launch autoware_launch autoware.launch.xml vehicle_model:=YOUR_VEHICLE sensor_kit:=YOUR_SENSOR_KIT map_path:=/PATH/TO/YOUR/MAP \
    launch_perception:=false \
    launch_planning:=false \
    launch_control:=false
Also, autoware_launch
package includes autoware modules parameter files under the config directory.
<YOUR-OWN-AUTOWARE-DIR>/
  └─ src/
       └─ launcher/
            └─ autoware_launch/
                 ├─ config/
                 ├─     ├─ control/
                 ├─     ├─ localization/
                 ├─     ├─ map/
                 ├─     ├─ perception/
                 ├─     ├─ planning/
                 ├─     ├─ simulator/
                 ├─     └─ system/
                 ├─launch/
                 └─ rviz/
So, if we change any parameter in config directory,
it will override the original parameter values
since autoware_launch parameter file path is used for parameter loading.

Configure autoware.launch.xml#
As we mentioned above,
we can enable or disable Autoware modules
to launch by modifying autoware.launch.xml or using command-line arguments.
Also, we have some arguments for specifying our Autoware configurations.
Here are some basic configurations for the autoware.launch.xml launch file:
(Additionally, you can use them as command-line arguments, as we mentioned before)
Vehicle#
In the Vehicle section, you can choose whether the vehicle interface will be launched or not.
For example, if you disable it, then vehicle_interface.launch.xml will not be called:
- <arg name="launch_vehicle_interface" default="true" description="launch vehicle interface"/>
+ <arg name="launch_vehicle_interface" default="false" description="launch vehicle interface"/>
Please be sure your vehicle interface driver included in vehicle_interface.launch.xml,
for more information you can refer the
creating vehicle interface
page.
Map#
If your point cloud and lanelet2 map names are different from pointcloud_map.pcd and lanelet2_map.osm, you will need to update these map file name arguments:
- <arg name="lanelet2_map_file" default="lanelet2_map.osm" description="lanelet2 map file name"/>
+ <arg name="lanelet2_map_file" default="<YOUR-LANELET2-MAP-FILE-NAME>" description="lanelet2 map file name"/>
- <arg name="pointcloud_map_file" default="pointcloud_map.pcd" description="pointcloud map file name"/>
+ <arg name="pointcloud_map_file" default="<YOUR-POINTCLOUD-MAP-FILE-NAME>" description="pointcloud map file name"/>
Perception#
You can define your autoware_data path here.
Autoware gets yabloc_pose_initializer,
image_projection_based_fusion,
lidar_apollo_instance_segmentation etc. models file with autoware_data path.
If you use ansible for autoware installation,
the necessary artifacts will be downloaded at autoware_data folder on your $HOME directory.
If you want to download artifacts manually,
please check ansible artifacts page for information.
- <arg name="data_path" default="$(env HOME)/autoware_data" description="packages data and artifacts directory path"/>
+ <arg name="data_path" default="<YOUR-AUTOWARE-DATA-PATH>" description="packages data and artifacts directory path"/>
Also, you can change your perception method here.
The Autoware provides camera-lidar-radar fusion,
camera-lidar fusion, lidar-radar fusion, lidar only and radar only perception modes.
The default perception method is lidar only mode,
but if you want to use camera-lidar fusion you need to change your perception mode:
-  <arg name="perception_mode" default="lidar" description="select perception mode. camera_lidar_radar_fusion, camera_lidar_fusion, lidar_radar_fusion, lidar, radar"/>
+  <arg name="perception_mode" default="camera_lidar_fusion" description="select perception mode. camera_lidar_radar_fusion, camera_lidar_fusion, lidar_radar_fusion, lidar, radar"/>
If you want to use traffic light recognition and visualization,
you can set traffic_light_recognition/enable_fine_detection as true (default).
Please check
traffic_light_fine_detector
page for more information.
If you don't want to use traffic light classifier, then you can disable it:
- <arg name="traffic_light_recognition/enable_fine_detection" default="true" description="enable traffic light fine detection"/>
+ <arg name="traffic_light_recognition/enable_fine_detection" default="false" description="enable traffic light fine detection"/>
Please look at Launch perception page for detailed information.
Launch Autoware#
Launch Autoware with the following command:
ros2 launch autoware_launch autoware_launch.launch.xml map_path:=<YOUR-MAP-PATH> vehicle_model:=<YOUR-VEHICLE-MODEL> sensor_model:=<YOUR-SENSOR-MODEL> vehicle_id:=<YOUR-VEHICLE-ID>
It is possible to specify which components to launch using command-line arguments. For example, if you don't need to launch perception, planning, and control for localization debug, you can launch the following:
ros2 launch autoware_launch autoware_launch.launch.xml map_path:=<YOUR-MAP-PATH> vehicle_model:=<YOUR-VEHICLE-MODEL> sensor_model:=<YOUR-SENSOR-MODEL> vehicle_id:=<YOUR-VEHICLE-ID> \
    launch_perception:=false \
    launch_planning:=false \
    launch_control:=false
After launching Autoware, we need to initialize our vehicle on our map.
If you set gnss_poser for your GNSS/INS sensor at gnss.launch.xml,
then gnss_poser will send pose for initialization.
If you don't have a GNSS sensor, then you need to set initial pose manually.
Set initial pose#
If not or if the automatic initialization returns an incorrect position, you need to set the initial pose using the RViz GUI.
- Click the 2D Pose estimate button in the toolbar, or hit the P key

- In the 3D View panel, click and hold the left mouse button, and then drag to set the direction for the initial pose.
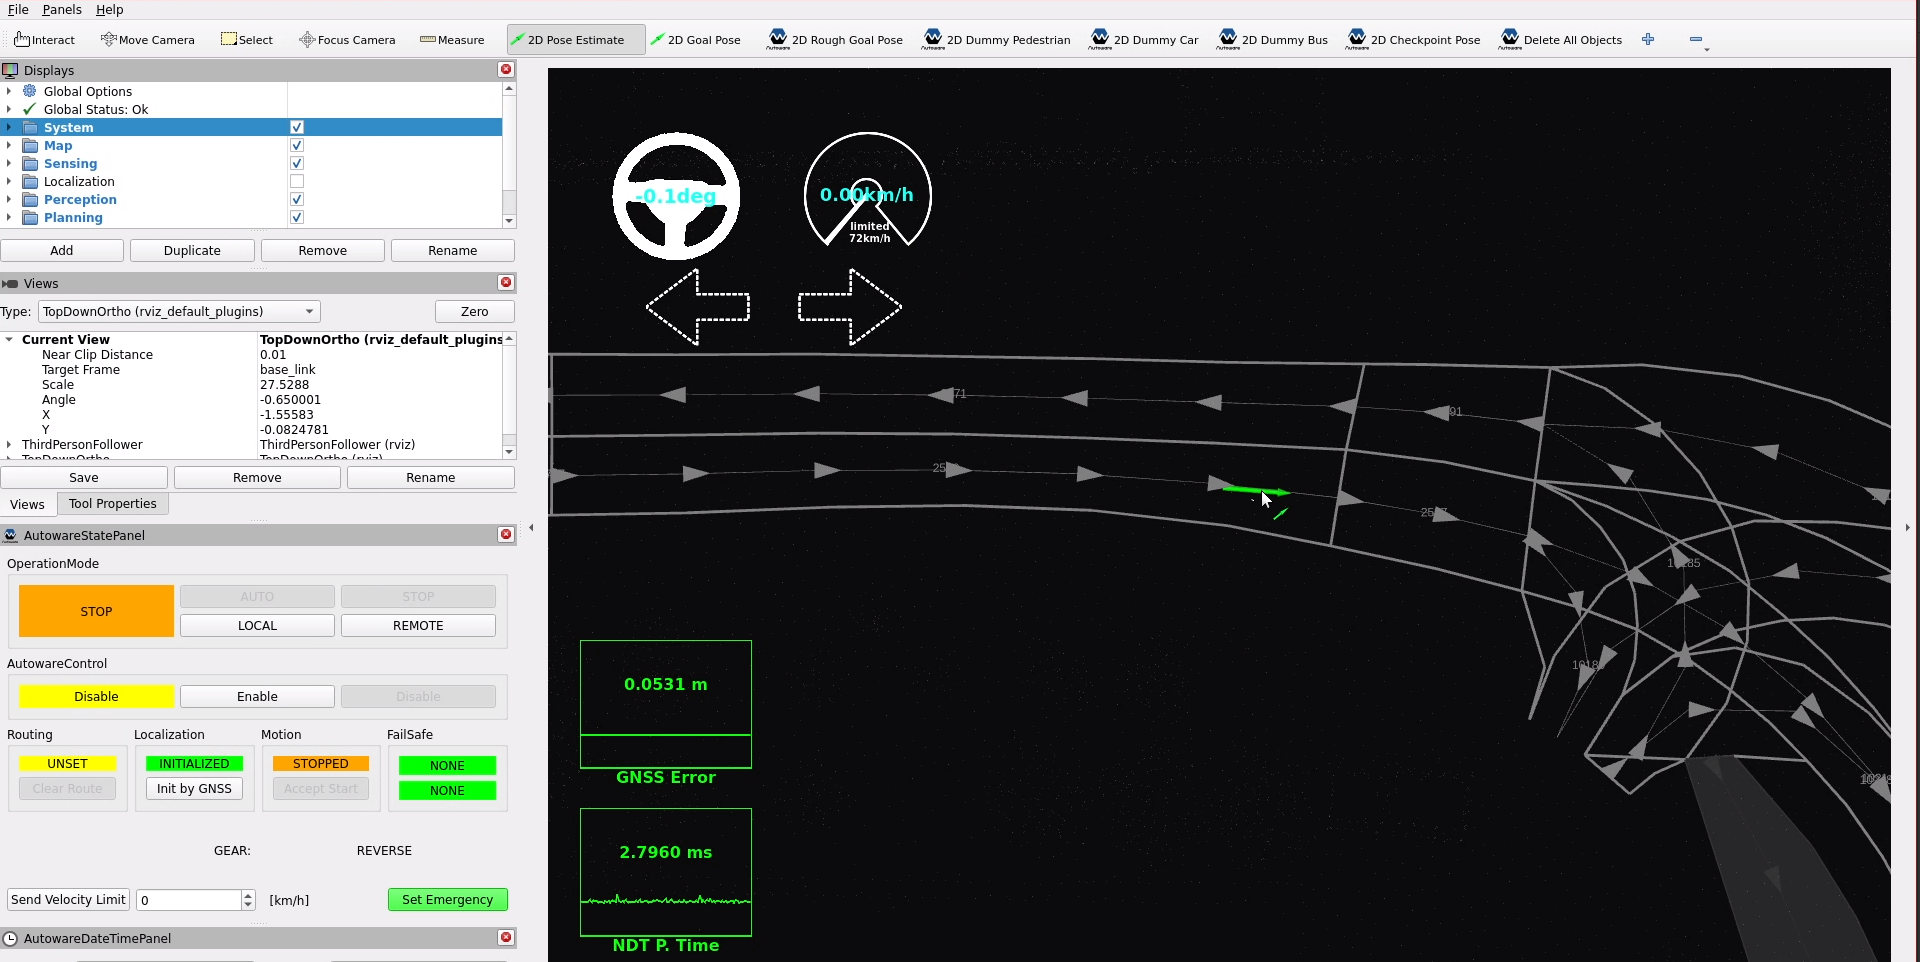
- After that, the vehicle will be initialized. You will then observe both your vehicle and Autoware outputs.
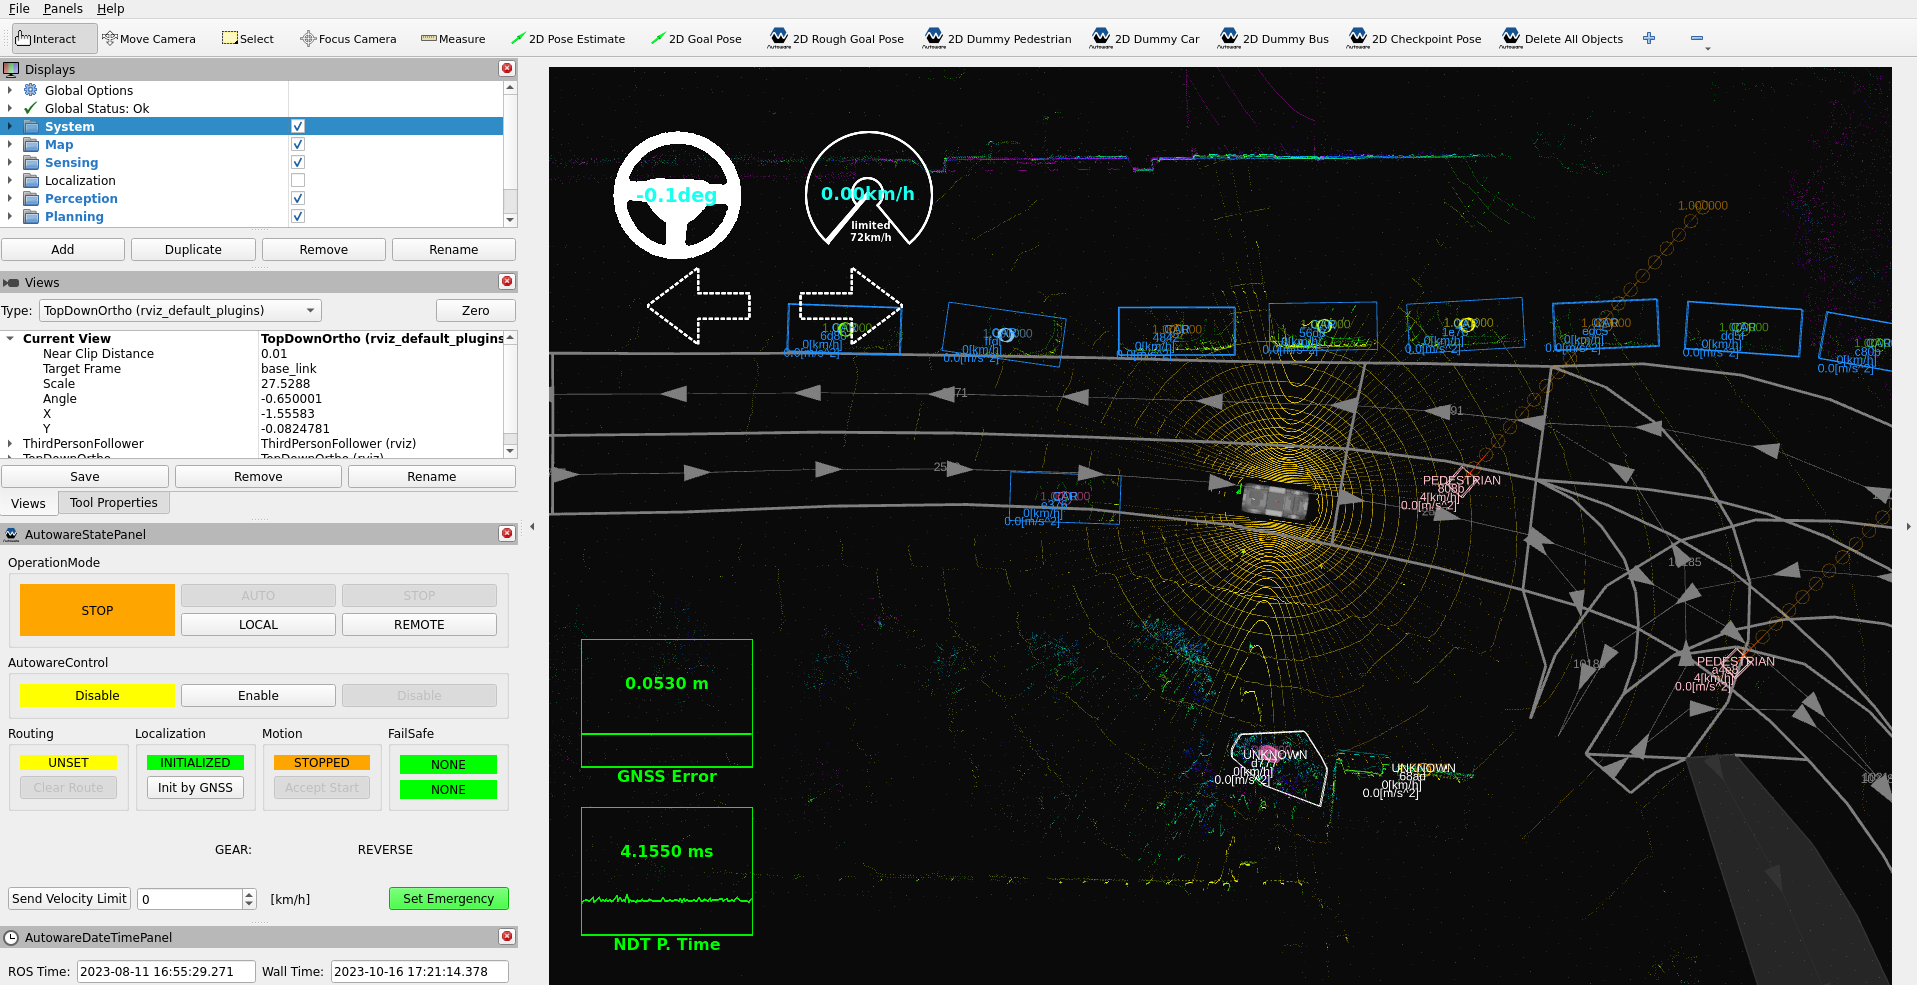
Set goal pose#
Set a goal pose for the ego vehicle.
- Click the 2D Nav Goal button in the toolbar, or hit the G key

- In the 3D View pane, click and hold the left mouse button, and then drag to set the direction for the goal pose.
- If successful, you will see the calculated planning path on RViz.
Engage#
There are two options for engage:
- Firstly, you can use
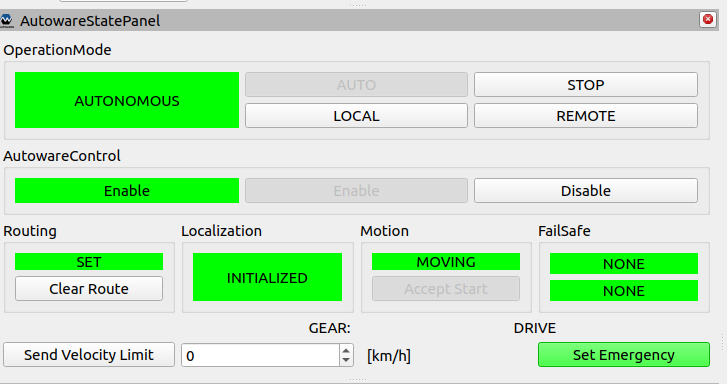
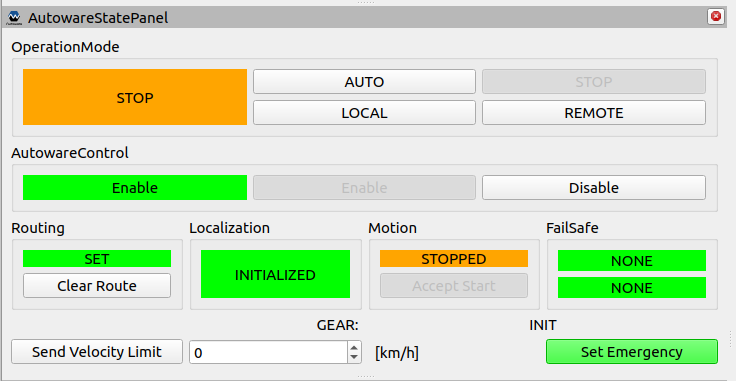
AutowareStatePanel, it is included in Autoware RViz configuration file, but it can be found inPanels > Add New Panel > tier4_state_rviz_plugin > AutowareStatePanel.
Once the route is computed, the "AUTO" button becomes active. Pressing the AUTO button engages the autonomous driving mode.
- Secondly, you can engage with ROS 2 topic. In your terminal, execute the following command.
source ~/<YOUR-AUTOWARE-DIR>/install/setup.bash
ros2 topic pub /<YOUR-AUTOWARE-DIR>/engage autoware_auto_vehicle_msgs/msg/Engage "engage: true" -1
Now the vehicle should drive along the calculated path!
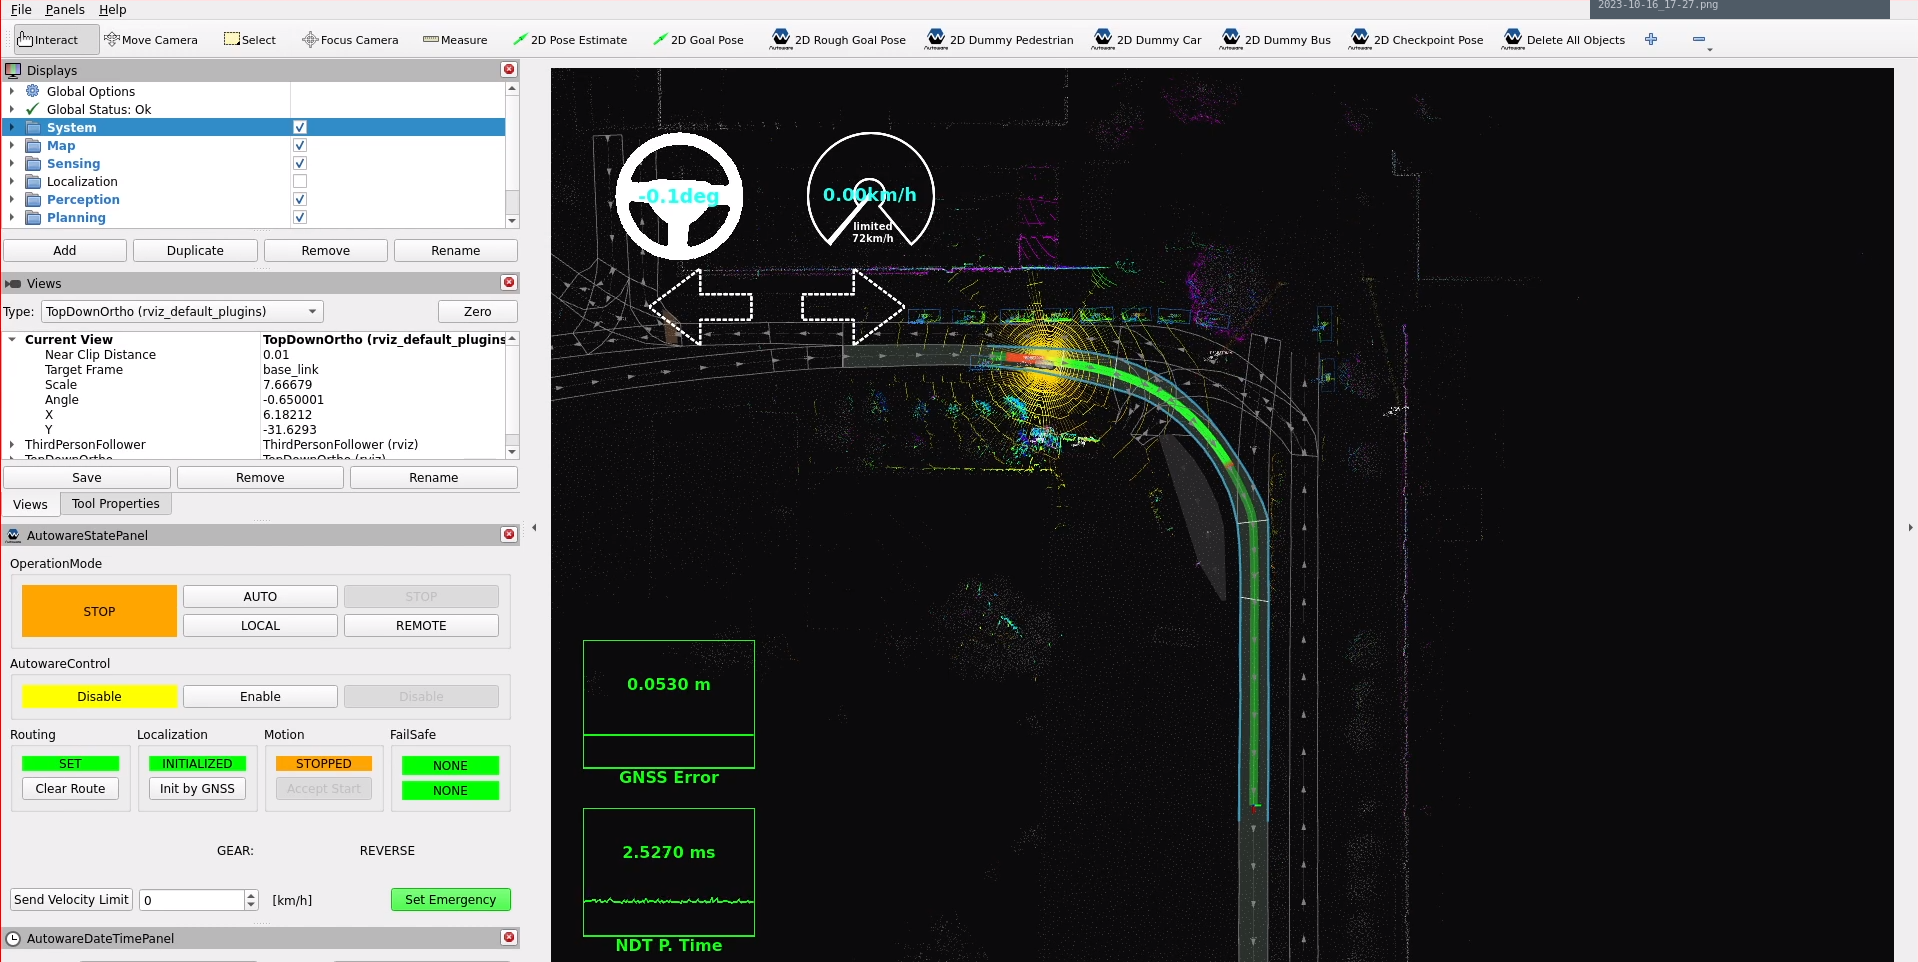
During the autonomous driving, the StatePanel appears as shown in the image below. Pressing the "STOP" button allows you to stop the vehicle.