Lidar-Lidar calibration#
Overview#
In this tutorial, we will explain lidar-lidar calibration over mapping-based lidar-lidar calibration tool of TIER IV's CalibrationTools.
Warning
Please obtain the initial calibration results from the Manual Calibration section. This is crucial for obtaining accurate results from this tool. We will utilize the initial calibration parameters that were calculated in the previous step of this tutorial. To apply these initial values in the calibration tools, please update your sensor calibration files within the individual parameter package.
We need a sample bag file for the lidar-lidar calibration process which includes raw lidar topics. Also, we recommend using an outlier-filtered point cloud for mapping because this point cloud includes a cropped vehicle point cloud. Therefore, vehicle points are not included in the map. When you start the bag recording, you should not move the vehicle for the first 5 seconds for better mapping performace. The following shows an example of a bag file used for this calibration:
ROS 2 Bag example of our calibration process for tutorial_vehicle
Files:             rosbag2_2023_09_05-11_23_50_0.db3
Bag size:          3.8 GiB
Storage id:        sqlite3
Duration:          112.702s
Start:             Sep  5 2023 11:23:51.105 (1693902231.105)
End:               Sep  5 2023 11:25:43.808 (1693902343.808)
Messages:          2256
Topic information: Topic: /sensing/lidar/front/pointcloud_raw | Type: sensor_msgs/msg/PointCloud2 | Count: 1128 | Serialization Format: cdr
                   Topic: /sensing/lidar/top/pointcloud | Type: sensor_msgs/msg/PointCloud2 | Count: 1128 | Serialization Format: cdr
Mapping-based lidar-lidar calibration#
Creating launch files#
We start with creating launch file four our vehicle like Extrinsic Manual Calibration
process:
cd <YOUR-OWN-AUTOWARE-DIRECTORY>/src/autoware/calibration_tools/sensor
cd extrinsic_calibration_manager/launch
cd <YOUR-OWN-SENSOR-KIT-NAME> # i.e. for our guide, it will ve cd tutorial_vehicle_sensor_kit which is created in manual calibration
touch mapping_based.launch.xml mapping_based_sensor_kit.launch.xml
We will be modifying these mapping_based.launch.xml and mapping_based_sensor_kit.launch.xml by using TIER IV's sample sensor kit aip_x1.
So,
you should copy the contents of these two files from aip_x1 to your created files.
Then we will continue with adding vehicle_id and sensor model names to the mapping_based.launch.xml:
(Optionally, values are not important. These parameters will be overridden by launch arguments)
  <arg name="vehicle_id" default="default"/>

  <let name="sensor_model" value="aip_x1"/>
+ <?xml version="1.0" encoding="UTF-8"?>
+ <launch>
-   <arg name="vehicle_id" default="default"/>
+   <arg name="vehicle_id" default="<YOUR_VEHICLE_ID>"/>
+
-   <arg name="sensor_model" default="aip_x1"/>
+   <let name="sensor_model" value="<YOUR_SENSOR_KIT_NAME>"/>
The final version of the file (mapping_based.launch.xml) for tutorial_vehicle should be like this:
Sample mapping_based.launch.xml file for tutorial vehicle
<?xml version="1.0" encoding="UTF-8"?>
<launch>
  <arg name="vehicle_id" default="tutorial_vehicle"/>
  <let name="sensor_model" value="tutorial_vehicle_sensor_kit"/>
  <arg name="rviz" default="true"/>

  <group>
    <push-ros-namespace namespace="sensor_kit"/>
    <include file="$(find-pkg-share extrinsic_calibration_manager)/launch/$(var sensor_model)/mapping_based_sensor_kit.launch.xml">
      <arg name="vehicle_id" value="$(var vehicle_id)"/>
      <arg name="rviz" value="$(var rviz)"/>
    </include>
  </group>
</launch>
After the completing of mapping_based.launch.xml file, we will be ready to implement mapping_based_sensor_kit.launch.xml for the own sensor model.
Optionally,
you can modify sensor_kit and vehicle_id as mapping_based.launch.xmlover this xml snippet:
(You can change rviz_profile path after the saving rviz config as video
which included at the end of the page)
We will add sensor kit frames for each lidar (except mapping lidar), we have one lidar for pairing to the main lidar sensor for tutorial vehicle, so it should be like:
Note: The mapping lidar will be used for mapping purposes, but it will not be calibrated. We can consider this lidar as the main sensor for our hardware architecture. Therefore, other lidars will be calibrated with respect to the mapping lidar (main sensor).
+  <let name="lidar_calibration_sensor_kit_frames" value="[
+  sensor_kit_base_link,
+  sensor_kit_base_link,
+  sensor_kit_base_link
+  ...]"/>
If you save rviz config file before for the lidar-lidar calibration process:
- <let name="rviz_profile" value="$(find-pkg-share extrinsic_mapping_based_calibrator)/rviz/x1.rviz"/>
+ <let name="rviz_profile" value="$(find-pkg-share extrinsic_mapping_based_calibrator)/rviz/<YOUR-RVIZ-CONFIG>.rviz"/>
i.e., If you have one main lidar for mapping, three lidar for calibration
+  <let name="lidar_calibration_sensor_kit_frames" value="[
+  sensor_kit_base_link,
+  sensor_kit_base_link,
+  sensor_kit_base_link]"/>
i.e., For tutorial_vehicle (one lidar main for mapping, one lidar for calibration)
+ <let name="lidar_calibration_sensor_kit_frames" value="[sensor_kit_base_link]"/>
We will add lidar_calibration_service_names, calibration_lidar_base_frames and calibration_lidar_frames for calibrator:
-   <let
-       name="lidar_calibration_service_names"
-       value="[
-       /sensor_kit/sensor_kit_base_link/livox_front_left_base_link,
-       /sensor_kit/sensor_kit_base_link/livox_front_center_base_link,
-       /sensor_kit/sensor_kit_base_link/livox_front_right_base_link]"
-     />
-   <let name="calibration_lidar_base_frames" value="[
-       livox_front_left_base_link,
-       livox_front_center_base_link,
-       livox_front_right_base_link]"/>
-   <let name="calibration_lidar_frames" value="[
-       livox_front_left,
-       livox_front_center,
-       livox_front_right]"/>
+   <let
+           name="lidar_calibration_service_names"
+           value="[/sensor_kit/sensor_kit_base_link/<YOUR_SENSOR_BASE_LINK>,
+                   /sensor_kit/sensor_kit_base_link/<YOUR_SENSOR_BASE_LINK
+                   ...]"
+   />
+
+   <let name="calibration_lidar_base_frames" value="[YOUR_SENSOR_BASE_LINK,
+                                                     YOUR_SENSOR_BASE_LINK
+                                                     ...]"/>
+   <let name="calibration_lidar_frames" value="[YOUR_SENSOR_LINK,
+                                                YOUR_SENSOR_LINK
+                                                ...]"/>
i.e., At the tutorial_vehicle it should be like this snippet
+   <let
+           name="lidar_calibration_service_names"
+           value="[/sensor_kit/sensor_kit_base_link/rs_bpearl_front_base_link]"
+   />

+   <let name="calibration_lidar_base_frames" value="[rs_bpearl_front_base_link]"/>
+   <let name="calibration_lidar_frames" value="[rs_bpearl_front]"/>
After that, we will add the sensor topics and sensor frames in order to do that,
we will continue filling the mapping_based_sensor_kit.launch.xml with
(we recommend
using the /sensing/lidar/top/pointcloud topic as the mapping pointcloud
because the vehicle cloud is cropped at this topic by pointcloud preprocessing):
-     <let name="mapping_lidar_frame" value="velodyne_top"/>
-     <let name="mapping_pointcloud" value="/sensing/lidar/top/pointcloud"/>
+     <let name="mapping_lidar_frame" value="<MAPPING_LIDAR_SENSOR_LINK>"/>
+     <let name="mapping_pointcloud" value="<MAPPING_LIDAR_POINTCLOUD_TOPIC_NAME>"/>


-     <let name="calibration_pointcloud_topics" value="[
-       /sensing/lidar/front_left/livox/lidar,
-       /sensing/lidar/front_center/livox/lidar,
-       /sensing/lidar/front_right/livox/lidar]"/>
+     <let name="calibration_pointcloud_topics" value="[
+       <YOUR_LIDAR_TOPIC_FOR_CALIBRATION>,
+       <YOUR_LIDAR_TOPIC_FOR_CALIBRATION>,
+       ...]"/>
At the tutorial_vehicle it should be like this snippet.
  <let name="calibration_lidar_base_frames" value="[rs_bpearl_front_base_link]"/>
  <let name="calibration_lidar_frames" value="[rs_bpearl_front]"/>

  <let name="mapping_lidar_frame" value="rs_helios_top"/>
  <let name="mapping_pointcloud" value="/sensing/lidar/top/pointcloud_raw"/>
  <let name="detected_objects" value="/perception/object_recognition/detection/objects"/>

<let name="calibration_pointcloud_topics" value="[
/sensing/lidar/right/pointcloud_raw]"/>
The mapping_based_sensor_kit.launch.xml launch file for tutorial_vehicle should be this:
i.e. mapping_based_sensor_kit.launch.xml for tutorial_vehicle
<?xml version="1.0" encoding="UTF-8"?>
<launch>
  <arg name="vehicle_id" default="tutorial_vehicle"/>
  <let name="sensor_model" value="tutorial_vehicle_sensor_kit"/>

  <arg name="rviz"/>
  <let name="rviz_profile" value="$(find-pkg-share extrinsic_mapping_based_calibrator)/rviz/x1.rviz"/>

  <arg name="src_yaml" default="$(find-pkg-share individual_params)/config/$(var vehicle_id)/$(var sensor_model)/sensor_kit_calibration.yaml"/>
  <arg name="dst_yaml" default="$(env HOME)/sensor_kit_calibration.yaml"/>

  <let name="camera_calibration_service_names" value="['']"/>

  <let name="camera_calibration_sensor_kit_frames" value="['']"/>
  <let name="calibration_camera_frames" value="['']"/>
  <let name="calibration_camera_optical_link_frames" value="['']"/>
  <let name="calibration_camera_info_topics" value="['']"/>

  <let name="calibration_image_topics" value="['']"/>

  <let name="lidar_calibration_sensor_kit_frames" value="[sensor_kit_base_link]"/>

<let
name="lidar_calibration_service_names"
value="[/sensor_kit/sensor_kit_base_link/rs_bpearl_front_base_link]"
/>

  <let name="calibration_lidar_base_frames" value="[rs_bpearl_front_base_link]"/>
  <let name="calibration_lidar_frames" value="[rs_bpearl_front]"/>

  <let name="mapping_lidar_frame" value="rs_helios_top"/>
  <let name="mapping_pointcloud" value="/sensing/lidar/top/pointcloud_raw"/>
  <let name="detected_objects" value="/perception/object_recognition/detection/objects"/>

<let name="calibration_pointcloud_topics" value="[
/sensing/lidar/right/pointcloud_raw]"/>

  <group>
    <!-- extrinsic_calibration_client -->
    <node pkg="extrinsic_calibration_client" exec="extrinsic_calibration_client" name="extrinsic_calibration_client" output="screen">
      <param name="src_path" value="$(var src_yaml)"/>
      <param name="dst_path" value="$(var dst_yaml)"/>
    </node>

    <!-- extrinsic_calibration_manager -->
    <node pkg="extrinsic_calibration_manager" exec="extrinsic_calibration_manager" name="extrinsic_calibration_manager" output="screen">
      <param name="parent_frame" value="sensor_kit_base_link"/>
      <param name="child_frames" value="[rs_bpearl_front_base_link]"/>
    </node>
  </group>

  <!-- mapping based calibrator -->
  <include file="$(find-pkg-share extrinsic_mapping_based_calibrator)/launch/calibrator.launch.xml">
    <arg name="ns" value=""/>

    <arg name="camera_calibration_service_names" value="$(var camera_calibration_service_names)"/>
    <arg name="lidar_calibration_service_names" value="$(var lidar_calibration_service_names)"/>
    <arg name="camera_calibration_sensor_kit_frames" value="$(var camera_calibration_sensor_kit_frames)"/>
    <arg name="lidar_calibration_sensor_kit_frames" value="$(var lidar_calibration_sensor_kit_frames)"/>
    <arg name="calibration_camera_frames" value="$(var calibration_camera_frames)"/>
    <arg name="calibration_camera_optical_link_frames" value="$(var calibration_camera_optical_link_frames)"/>
    <arg name="calibration_lidar_base_frames" value="$(var calibration_lidar_base_frames)"/>
    <arg name="calibration_lidar_frames" value="$(var calibration_lidar_frames)"/>
    <arg name="mapping_lidar_frame" value="$(var mapping_lidar_frame)"/>

    <arg name="mapping_pointcloud" value="$(var mapping_pointcloud)"/>
    <arg name="detected_objects" value="$(var detected_objects)"/>

    <arg name="calibration_camera_info_topics" value="$(var calibration_camera_info_topics)"/>
    <arg name="calibration_image_topics" value="$(var calibration_image_topics)"/>
    <arg name="calibration_pointcloud_topics" value="$(var calibration_pointcloud_topics)"/>

    <arg name="mapping_max_range" value="150.0"/>
    <arg name="local_map_num_keyframes" value="30"/>
    <arg name="dense_pointcloud_num_keyframes" value="20"/>
    <arg name="ndt_resolution" value="0.5"/>
    <arg name="ndt_max_iterations" value="100"/>
    <arg name="ndt_epsilon" value="0.005"/>
    <arg name="lost_frame_max_acceleration" value="15.0"/>
    <arg name="lidar_calibration_max_frames" value="10"/>
    <arg name="calibration_eval_max_corr_distance" value="0.2"/>
    <arg name="solver_iterations" value="100"/>
    <arg name="calibration_skip_keyframes" value="15"/>
  </include>

  <node pkg="rviz2" exec="rviz2" name="rviz2" output="screen" args="-d $(var rviz_profile)" if="$(var rviz)"/>
</launch>
Lidar-Lidar calibration process with interactive mapping-based calibrator#
After completing mapping_based.launch.xml and mapping_based_sensor_kit.launch.xml launch files for own sensor kit; now we are ready to calibrate our lidars. First of all, we need to build extrinsic_calibration_manager package:
colcon build --symlink-install --cmake-args -DCMAKE_BUILD_TYPE=Release --packages-select extrinsic_calibration_manager
So, we are ready to launch and use mapping-based lidar-lidar calibrator:
ros2 launch extrinsic_calibration_manager calibration.launch.xml mode:=mapping_based sensor_model:=<OWN-SENSOR-KIT> vehicle_model:=<OWN-VEHICLE-MODEL> vehicle_id:=<VEHICLE-ID>
For tutorial vehicle:
ros2 launch extrinsic_calibration_manager calibration.launch.xml mode:=mapping_based sensor_model:=tutorial_vehicle_sensor_kit vehicle_model:=tutorial_vehicle vehicle_id:=tutorial_vehicle
You will show the rviz2 screen with several configurations,
you need
to update it with your sensor information topics like the video,
which included an end of the document.
Also, you can save the rviz2 config on rviz directory,
so you can use it later with modifying mapping_based_sensor_kit.launch.xml.
extrinsic_ground_plane_calibrator/
   └─ rviz/
+        └─ tutorial_vehicle_sensor_kit.rviz
Then play ROS 2 bag file:
ros2 bag play <rosbag_path> --clock -r 0.2 \
--remap /tf:=/null/tf /tf_static:=/null/tf_static # if tf is recorded
The calibration step consists of two phases: mapping and calibration. At the bag starts playing, then mapping starts as well as the rviz2 screenshot below.
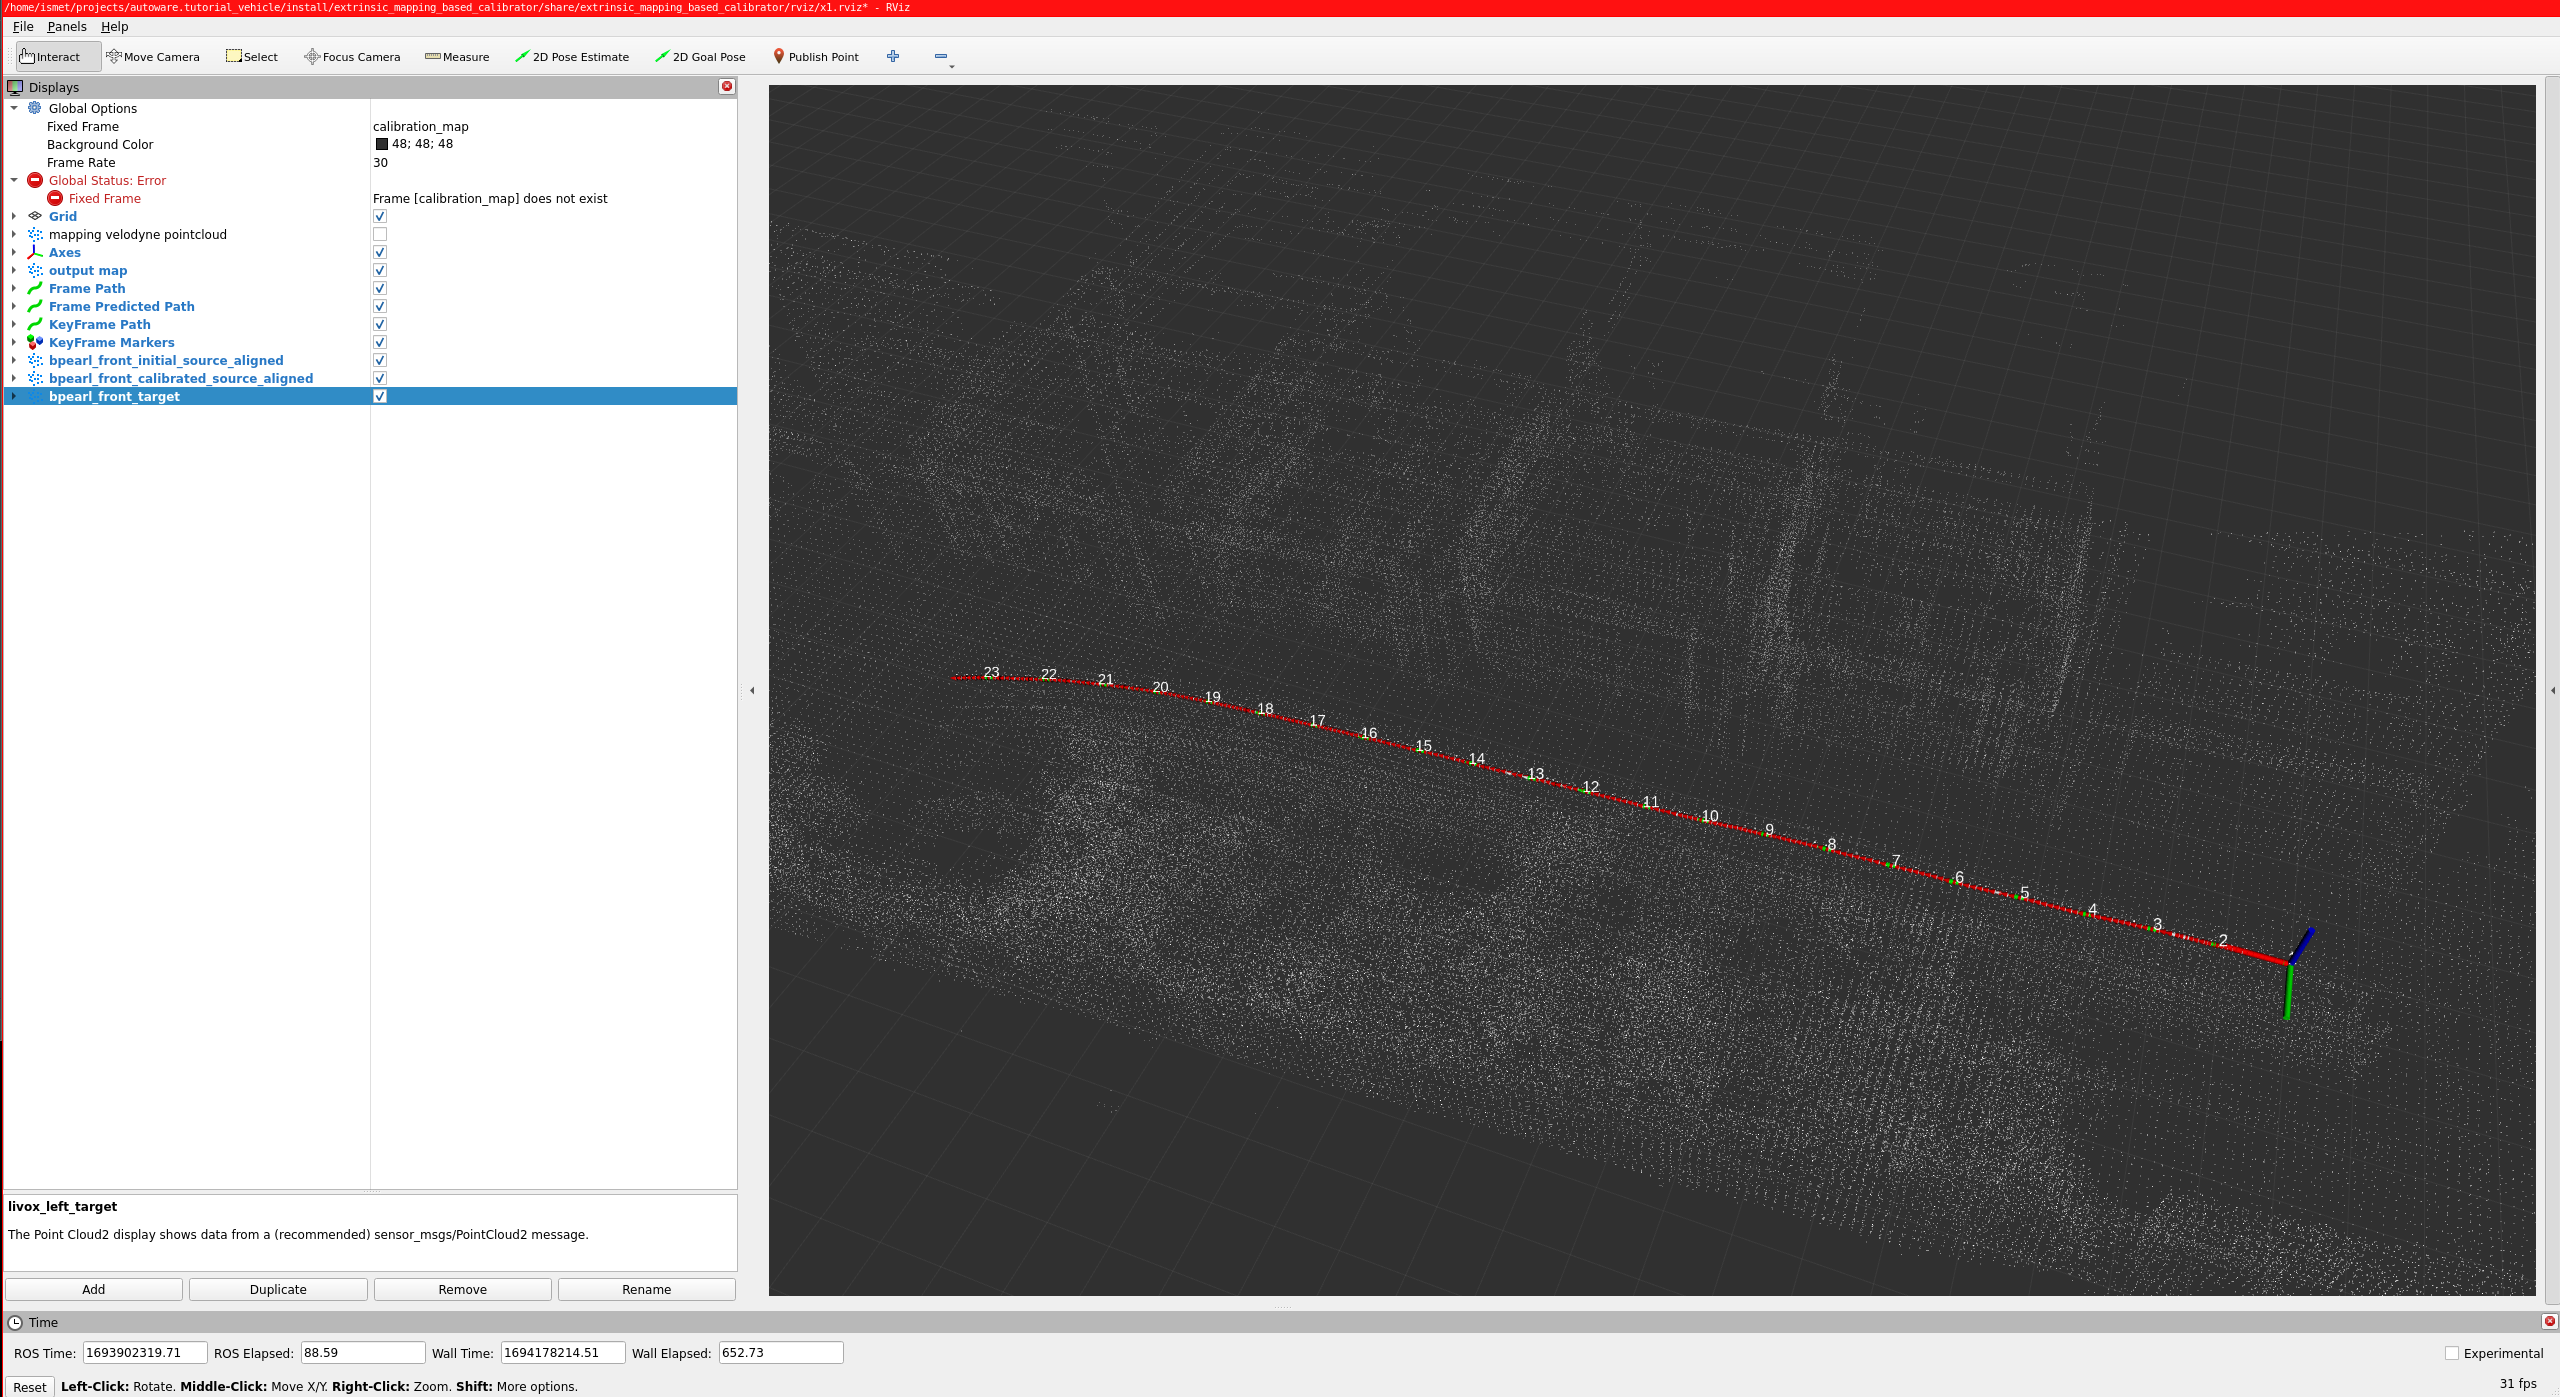
So, red arrow markers indicate poses during mapping, green arrow markers are special poses taken uniformly, and white points indicate the constructed map.
Mapping halts either upon reaching a predefined data threshold or can be prematurely concluded by invoking this service:
ros2 service call /NAMESPACE/stop_mapping std_srvs/srv/Empty {}
After the mapping phase of calibration is completed, then the calibration process will start. After the calibration is completed, then you should rviz2 screen like the image below:
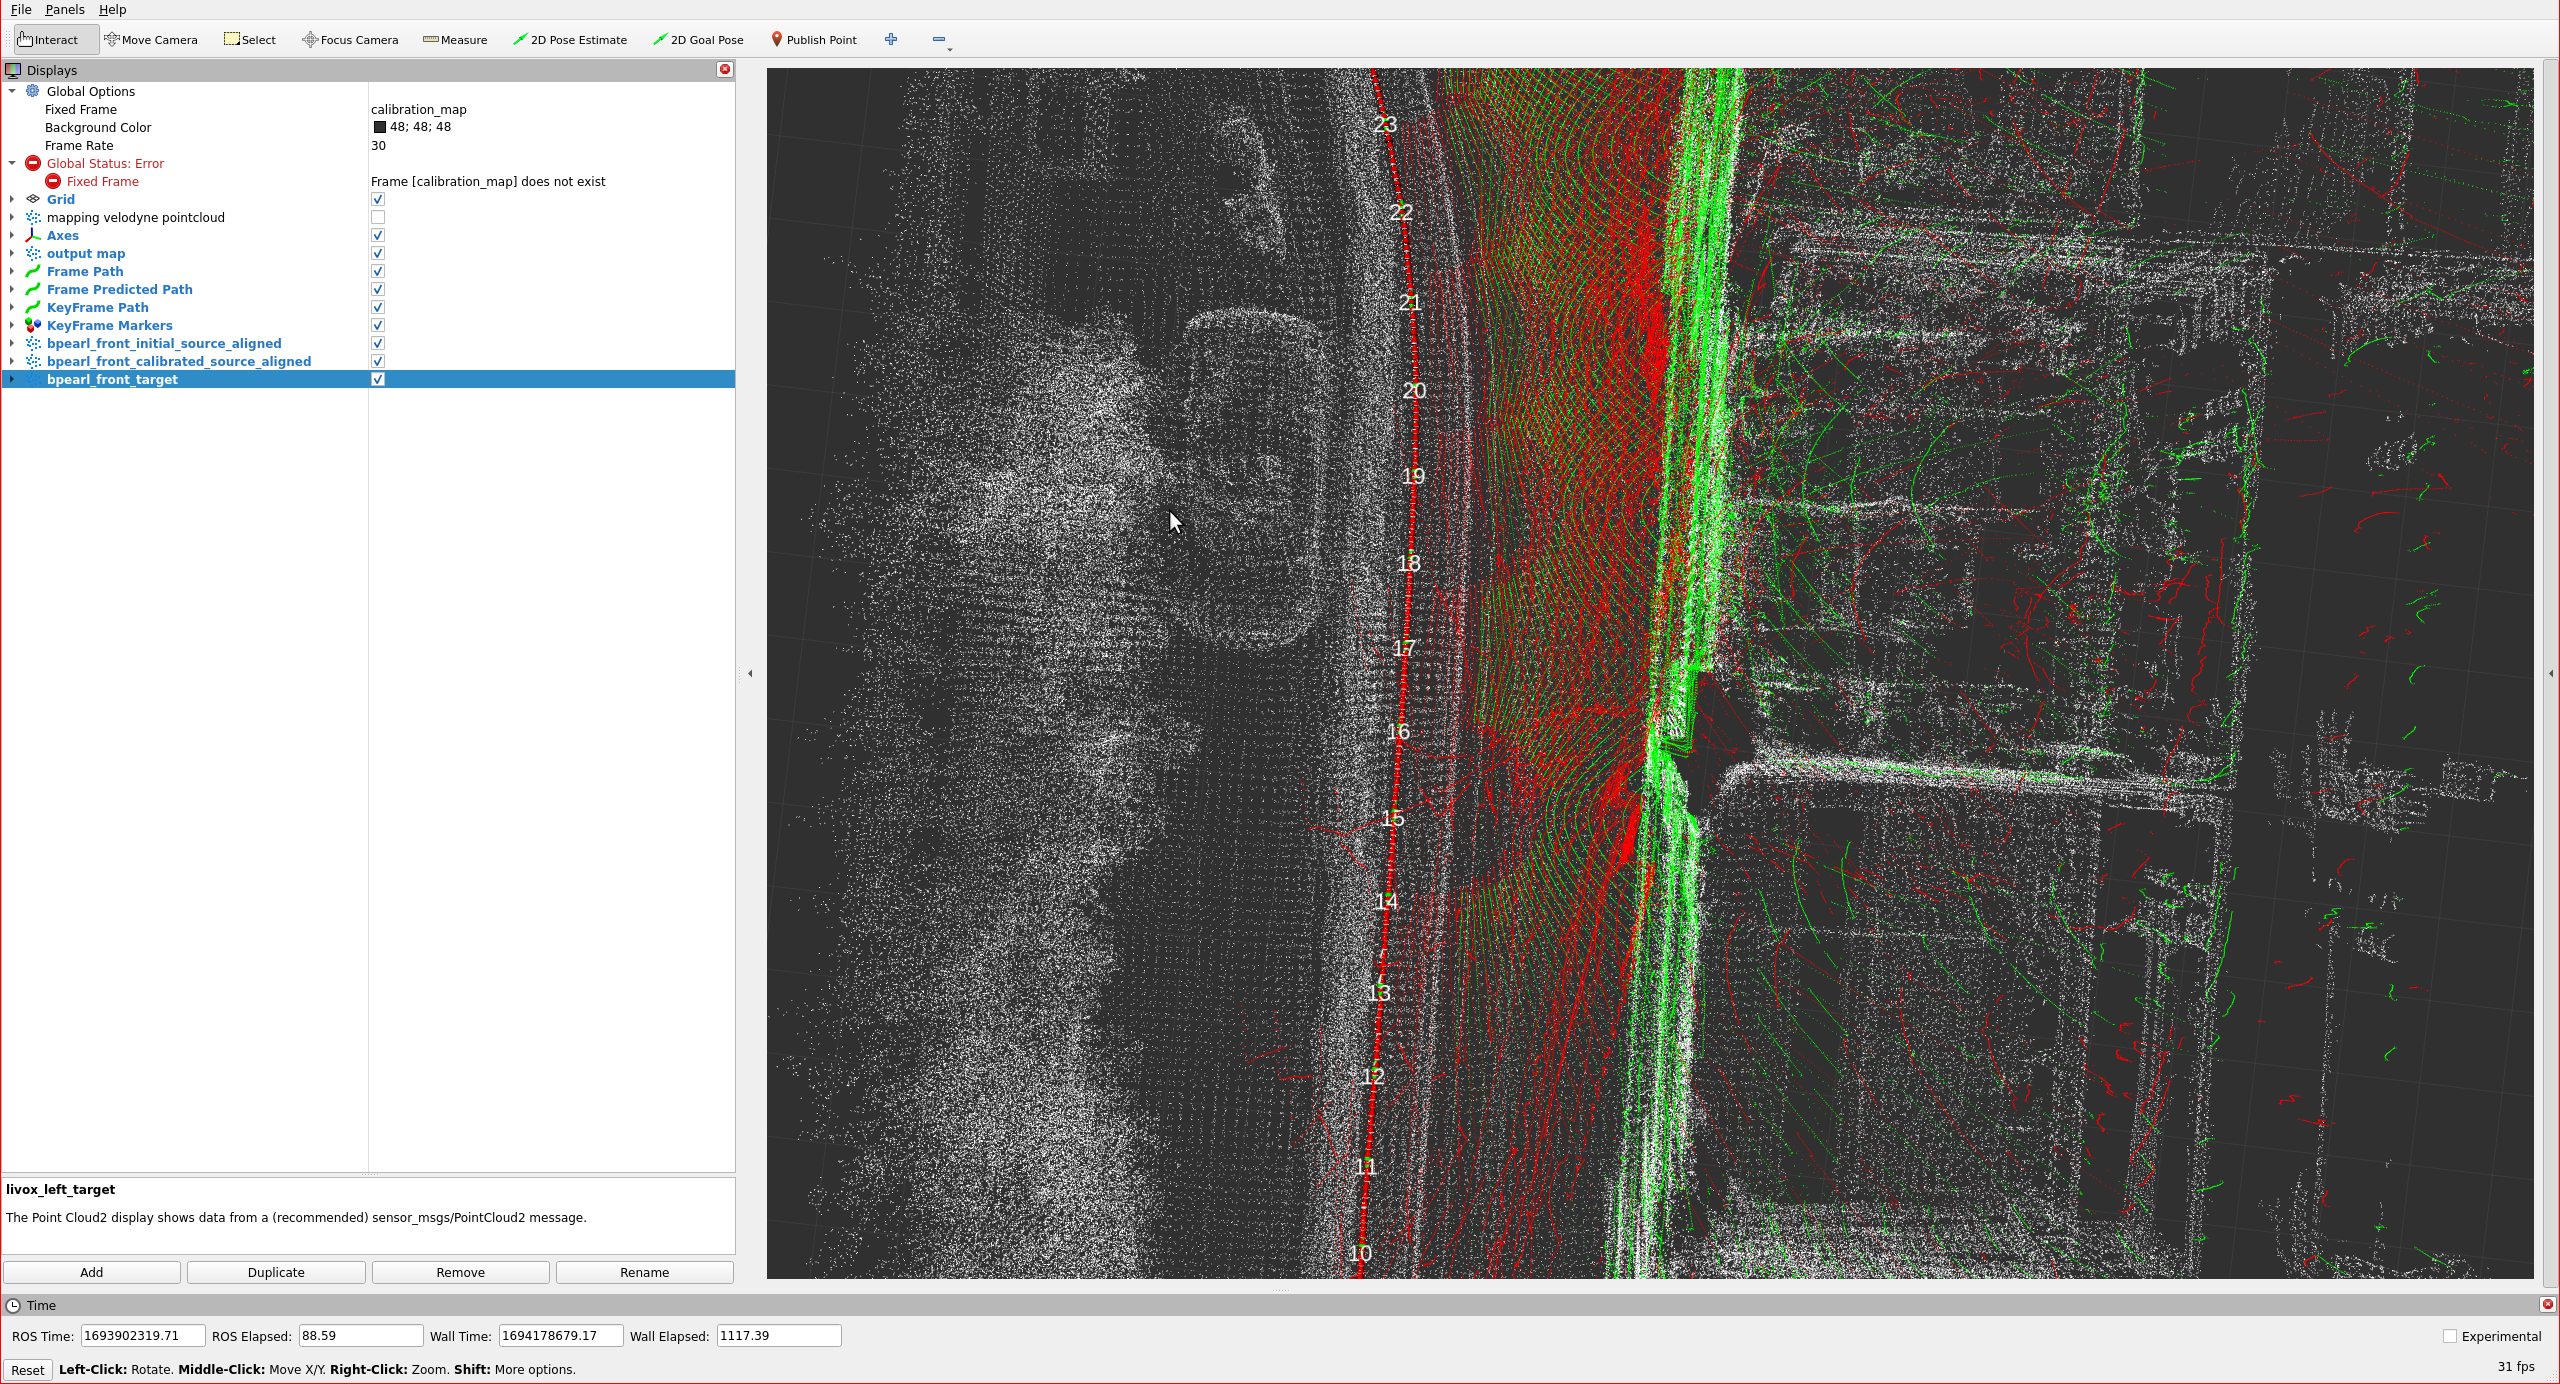
The red points indicate pointcloud that initial calibration results of previous section.
The green points indicate aligned point (calibration result).
The calibration results will be saved automatically on your
dst_yaml ($HOME/sensor_kit_calibration.yaml) at this tutorial.
Here is the video for demonstrating the mapping-based lidar-lidar calibration process on tutorial_vehicle: