Traffic light#
Behavior velocity planner's traffic light module plans velocity according to the traffic light status. In order to operate that, we will add traffic light attribute to our lanelet2 map.
Creating a traffic light regulatory element#
In order to create a traffic light on your pointcloud map, please follow these steps:
- Please select lanelet which traffic light to be added.
- Click
Abstractionbutton on top panel. - Select
Traffic Lightfrom the panel. - Click on the desired area for inserting traffic light.
You can see these steps in the traffic-light creating demonstration video:
Testing created the traffic light element with planning simulator#
After the completing of creating the map, we need to save it.
To that please click File --> Export Lanelet2Maps then download.
After the download is finished, we need to put lanelet2 map and pointcloud map on the same location. The directory structure should be like this:
+ <YOUR-MAP-DIRECTORY>/
+  ├─ pointcloud_map.pcd
+  └─ lanelet2_map.osm
If your .osm or .pcd map file's name is different from these names, you need to update autoware.launch.xml:
  <!-- Map -->
-  <arg name="lanelet2_map_file" default="lanelet2_map.osm" description="lanelet2 map file name"/>
+  <arg name="lanelet2_map_file" default="<YOUR-LANELET-MAP-NAME>.osm" description="lanelet2 map file name"/>
-  <arg name="pointcloud_map_file" default="pointcloud_map.pcd" description="pointcloud map file name"/>
+  <arg name="pointcloud_map_file" default="<YOUR-POINTCLOUD-MAP-NAME>.pcd" description="pointcloud map file name"/>
Now we are ready to launch the planning simulator:
ros2 launch autoware_launch planning_simulator.launch.xml map_path:=<YOUR-MAP-FOLDER-DIR> vehicle_model:=<YOUR-VEHICLE-MODEL> sensor_model:=<YOUR-SENSOR-KIT>
Example for tutorial_vehicle:
ros2 launch autoware_launch planning_simulator.launch.xml map_path:=$HOME/Files/autoware_map/tutorial_map/ vehicle_model:=tutorial_vehicle sensor_model:=tutorial_vehicle_sensor_kit vehicle_id:=tutorial_vehicle
- Click
2D Pose Estimatebutton on rviz or pressPand give a pose for initialization. - Click
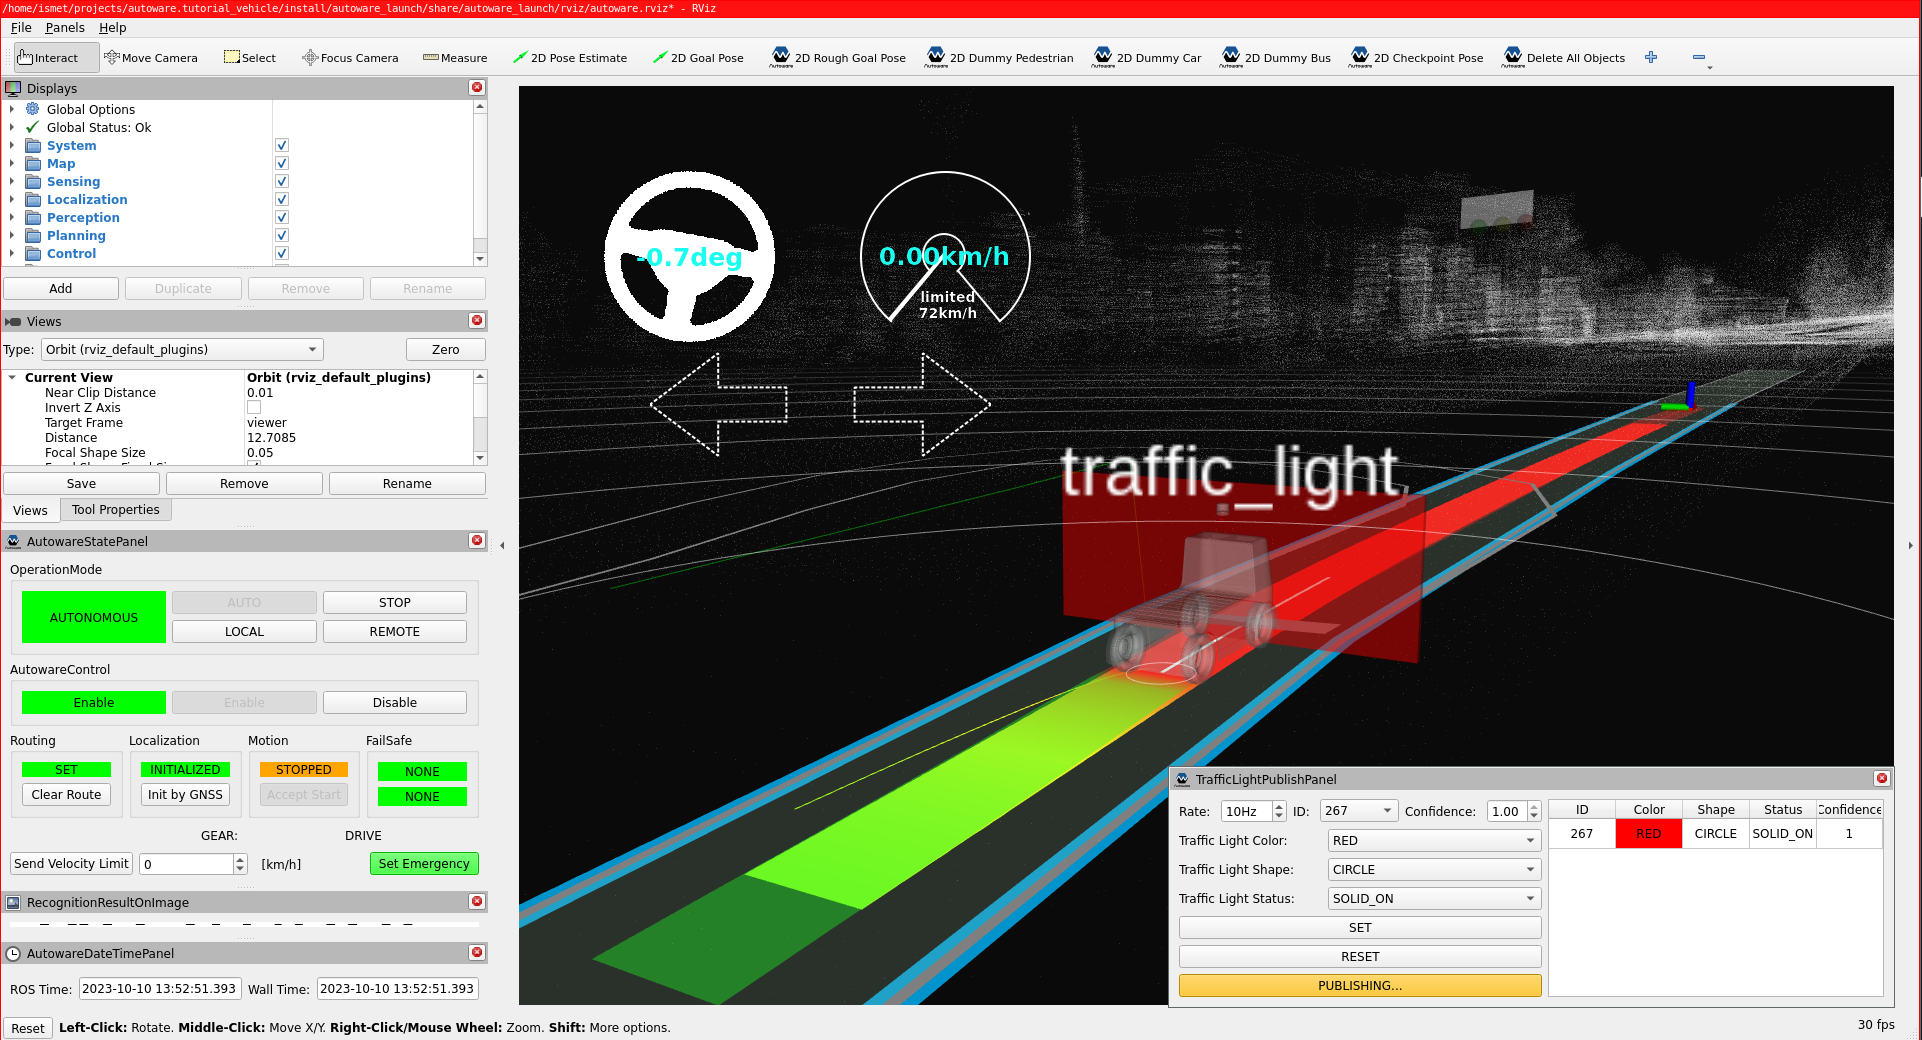
Panels->Add new panel, selectTrafficLightPublishPanel, and then pressOK. - In TrafficLightPublishPanel, set the ID and color of the traffic light.
- Then, Click
SETandPUBLISHbutton. - Click
2D Goal Posebutton on rviz or pressGand give a pose for goal point. - You can see the traffic light marker on the rviz screen if you set the traffic light color as
RED.
Traffic Light markers on rviz:
You can check your traffic light elements in the planning simulator as this demonstration video: